TimeKeeping Report
Timekeeping Reports allow dispatchers and transportation providers the ability to get comprehensive reports on all employee time records. Users can easily print the report over their selected date range, or download CSV formats. User's can view all employees time at a glance or view a single employees time records.
Step 1
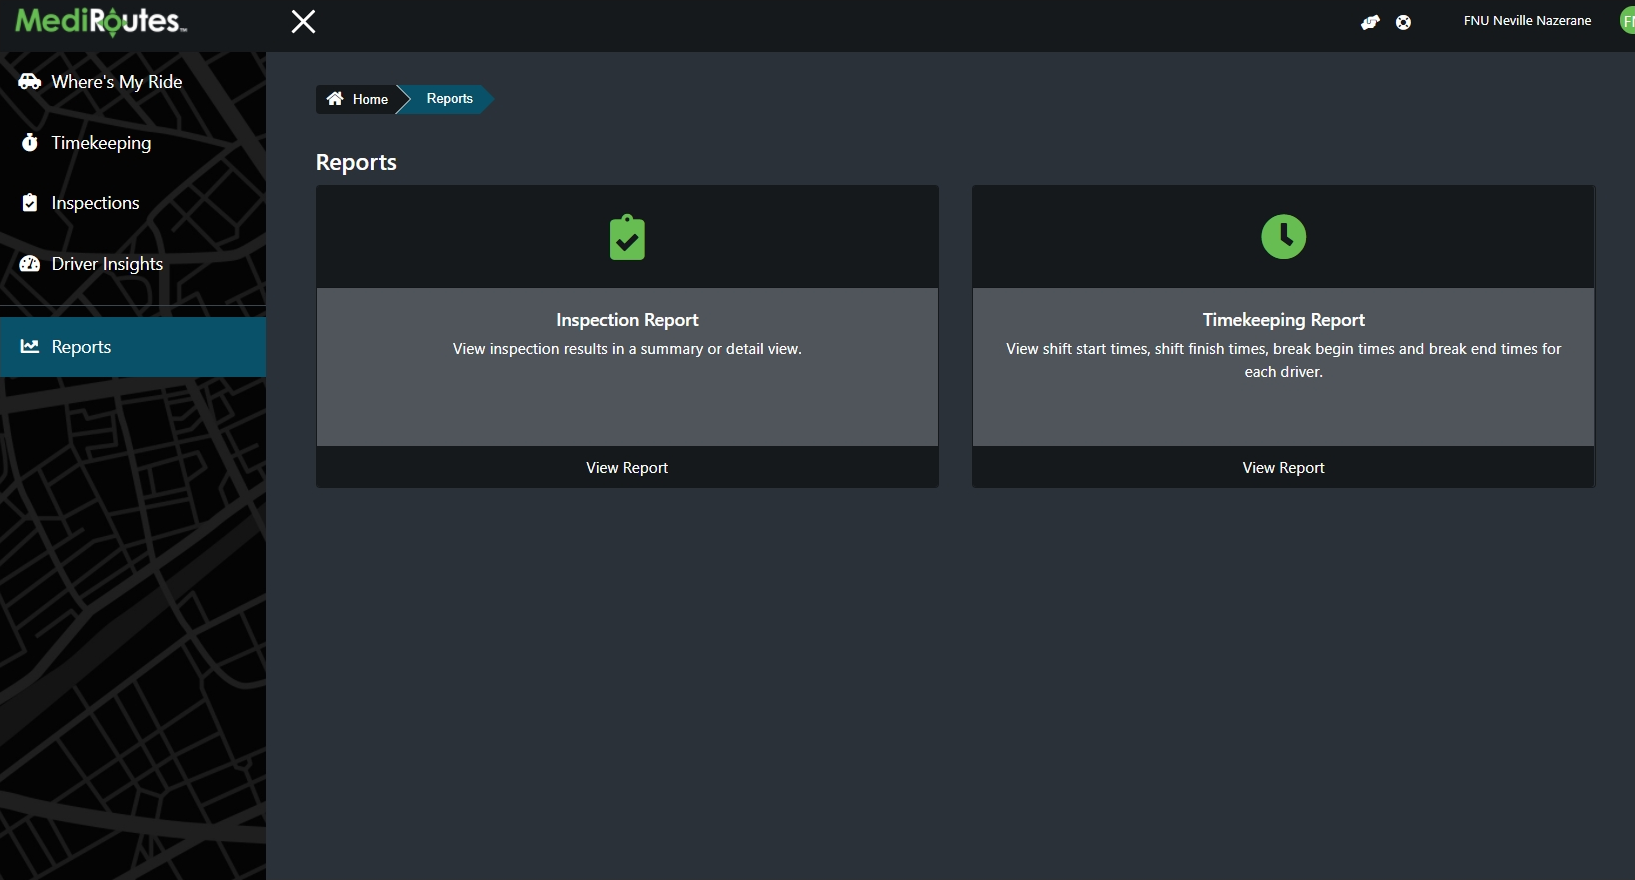
Navigate to the Reports page and select Timekeeping Report.
Step 2
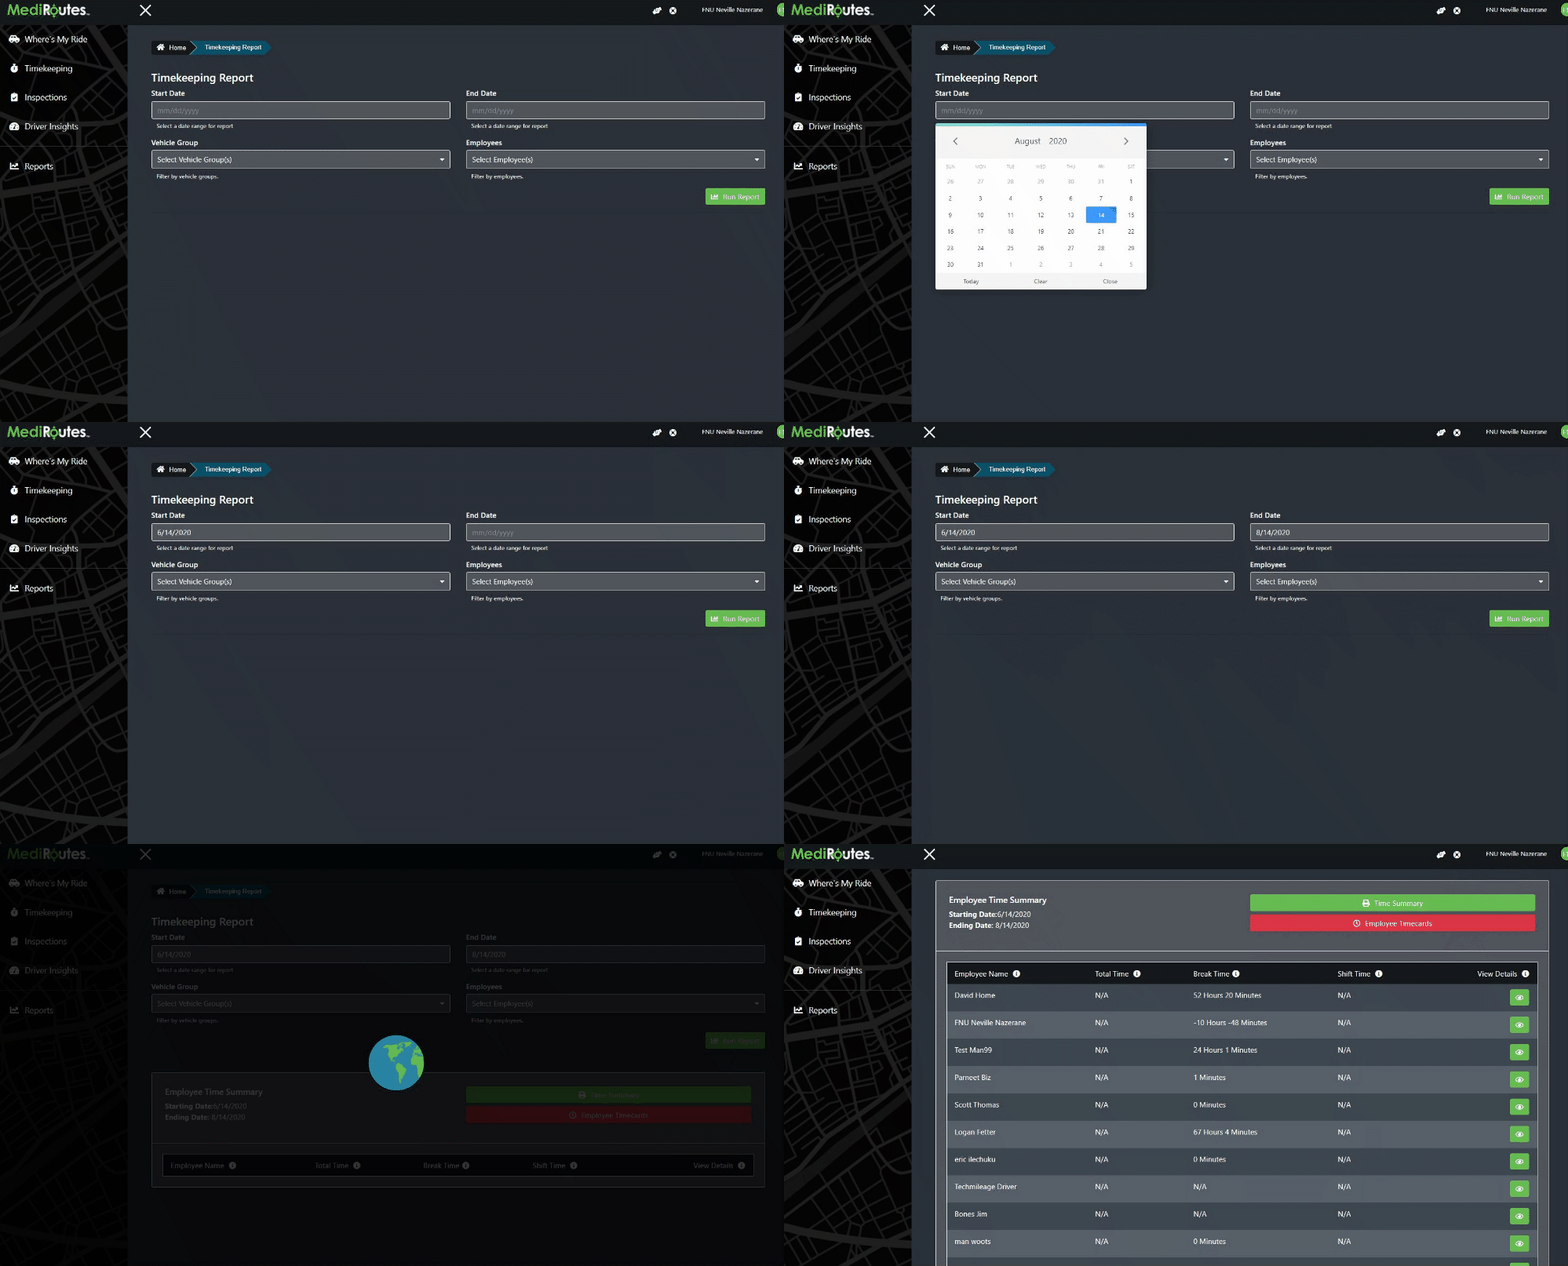
Select a Start and End Date that the report should run between. By default, all employees will be included in the report. You can optionally filter but a single employee or a group of employees. Click Run Report.
Step 3
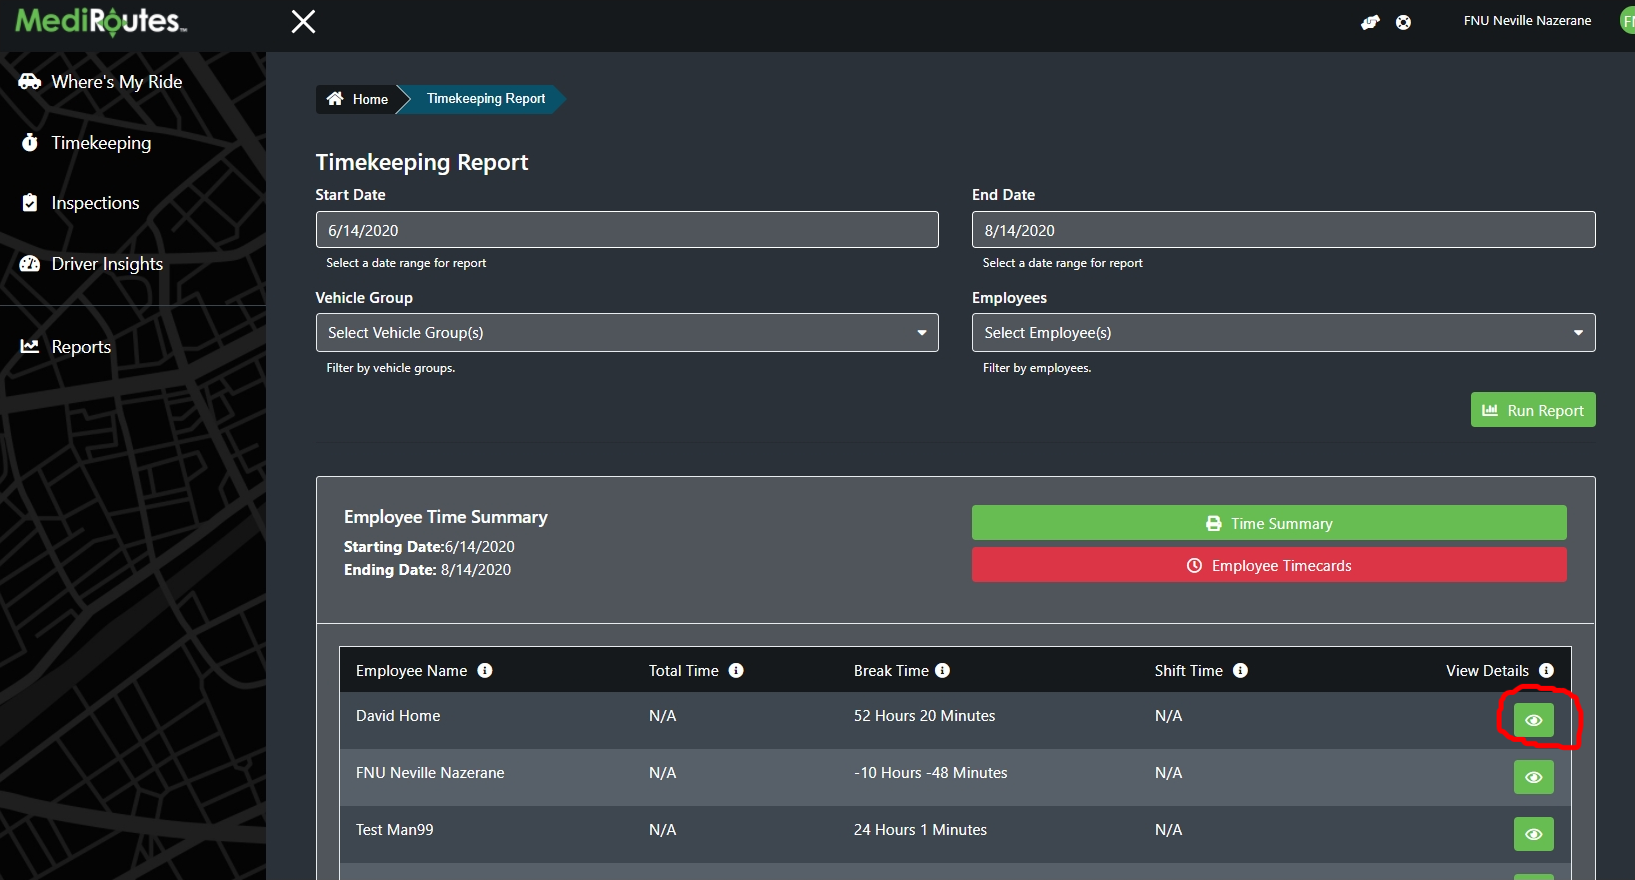
Click the green eyeball icon next to a driver row to launch the day view in a new tab.
Step 4
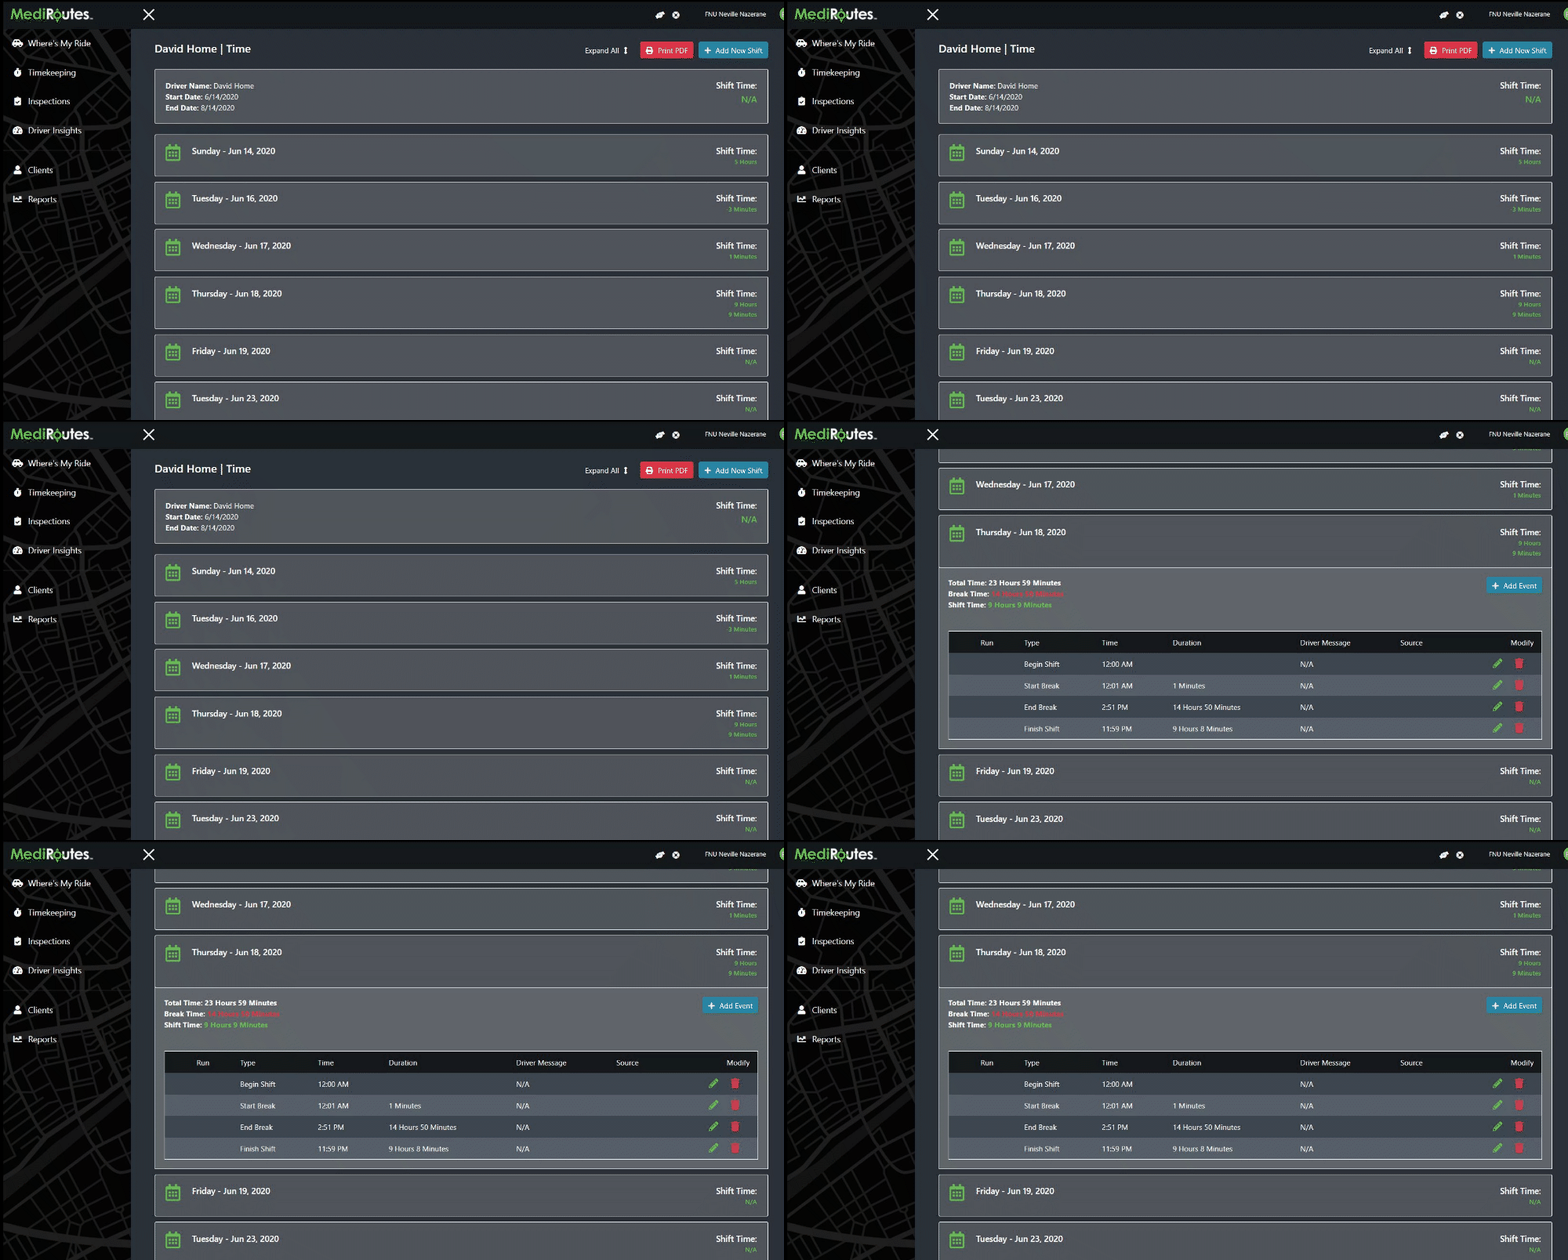
On this screen users can see a break-down of hours for each day. Click one of the days to see the shift and break times for that day.
Step 5
Occasionaly a driver may forget to clock-out at the end of the day. This information will be required to accurately run a report. For this reason, dispatchers or admins have the ability to add missing days, missing shift or break events, and edit the times of existing events.
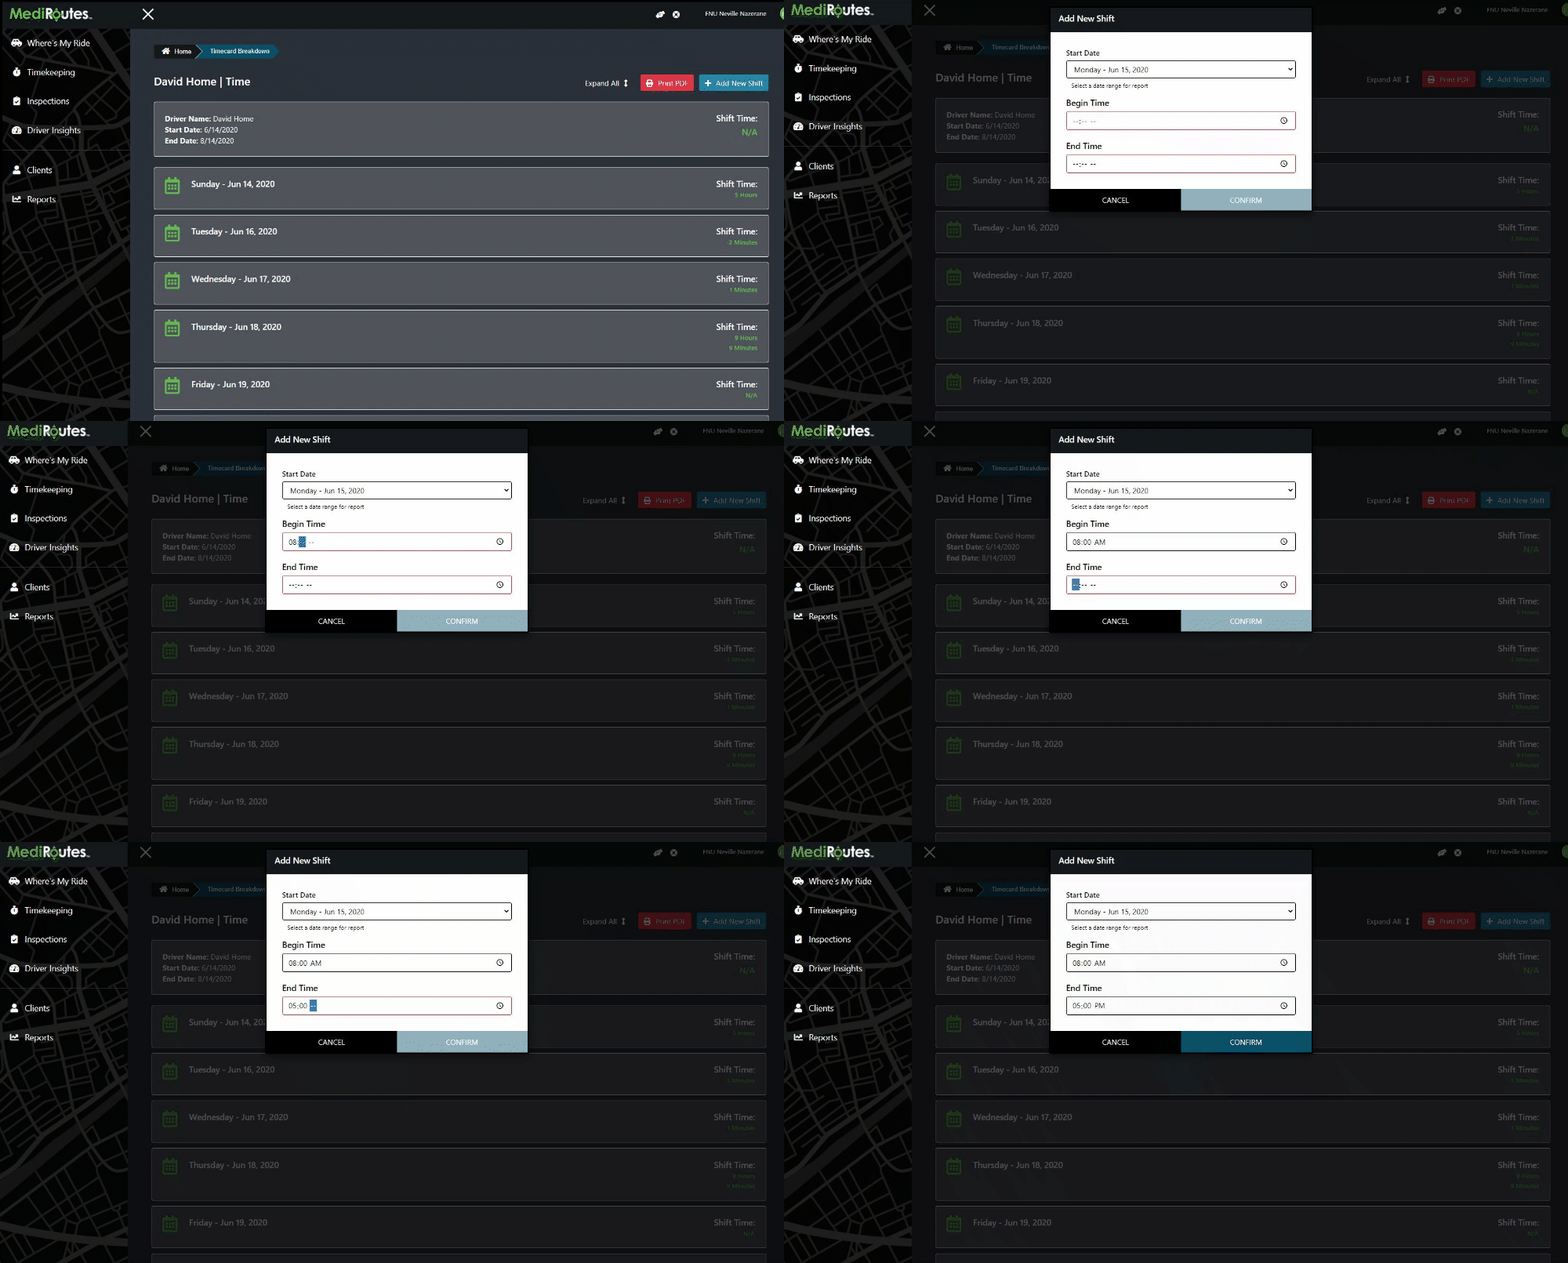
Below is an example of adding a missing day to the record. Click the Add Shift button at top right. When selecting the Start Date dropdown, users can pick from days that occured during the date range, and only days that are not already on the report.
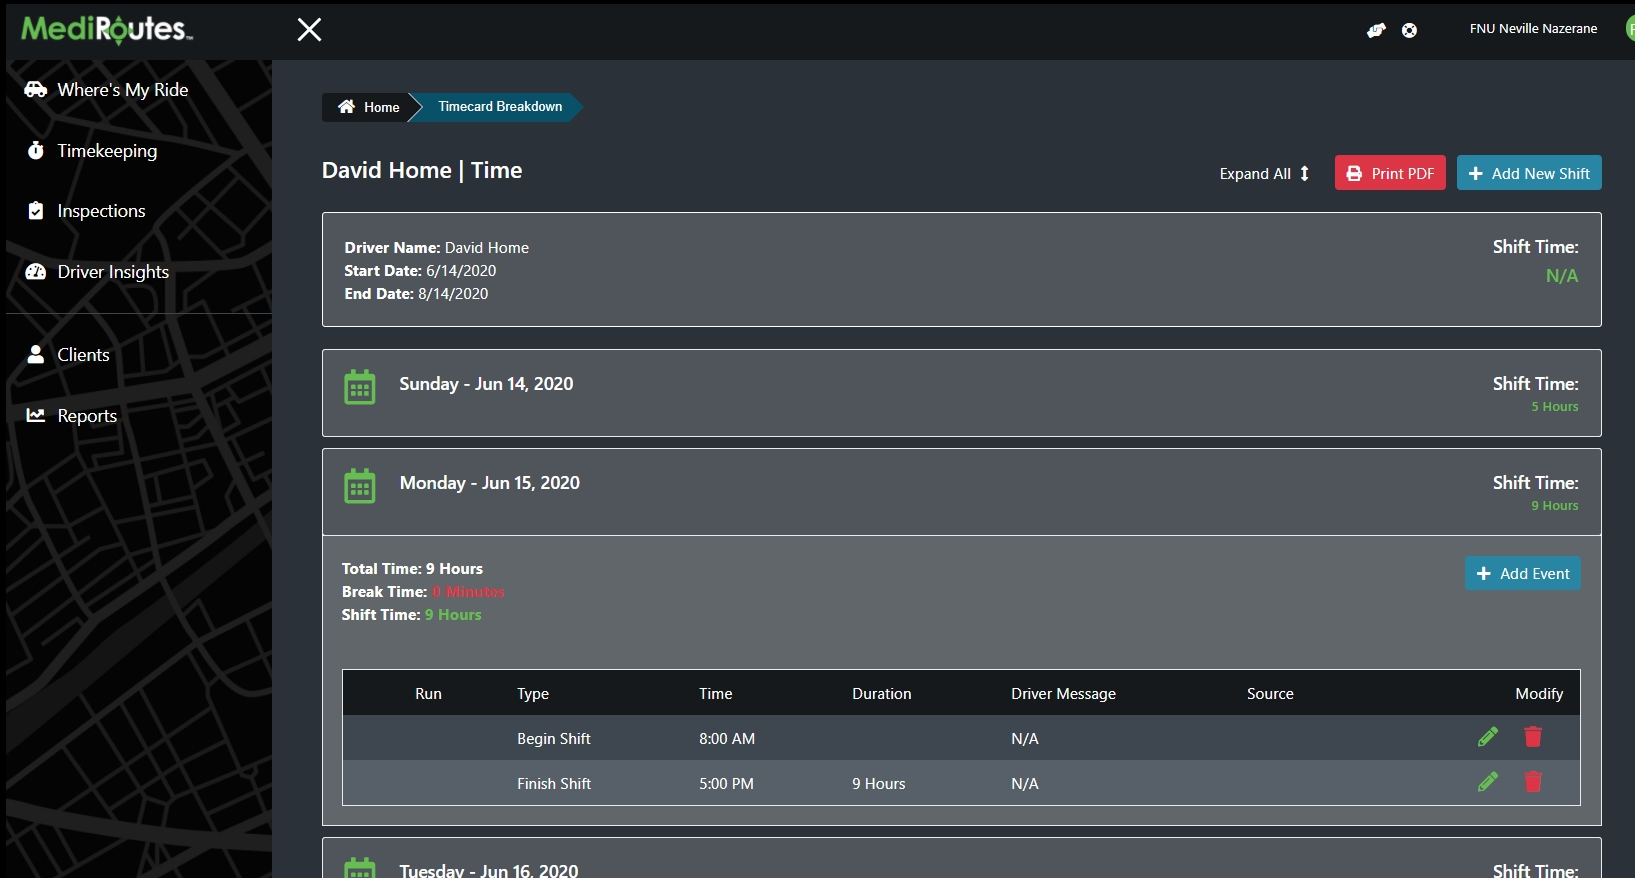
We can see below that the new shift of Monday - June 15th, 2020 has been added.
Step 6
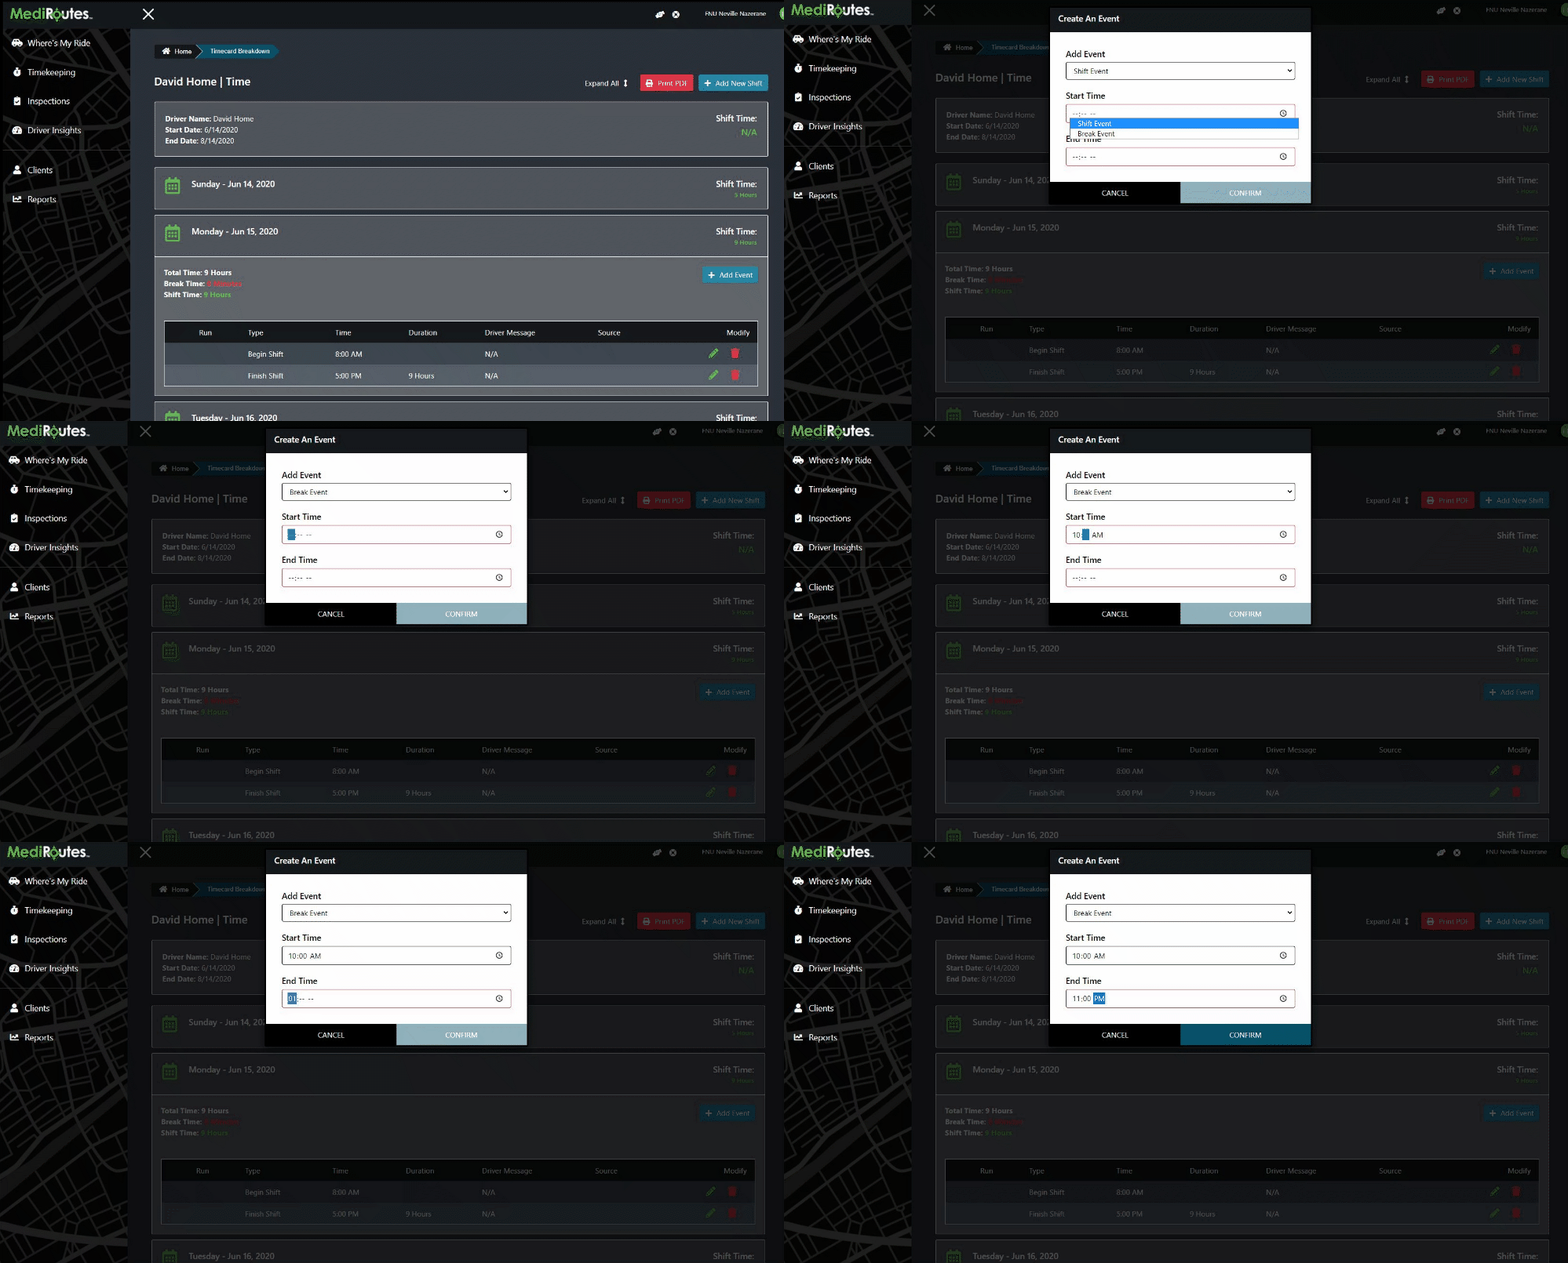
Within the new shift record lets add a break event for this employee. We'll set his break time from 10am - 11am. We can select either Shift or Break events and add a Start / End time.
Step 7
Turns out the driver actually took a 2 hour break. Lets edit the End Time from 11am to 12pm. User can also remove an event by clicking the red trash icon on each row.
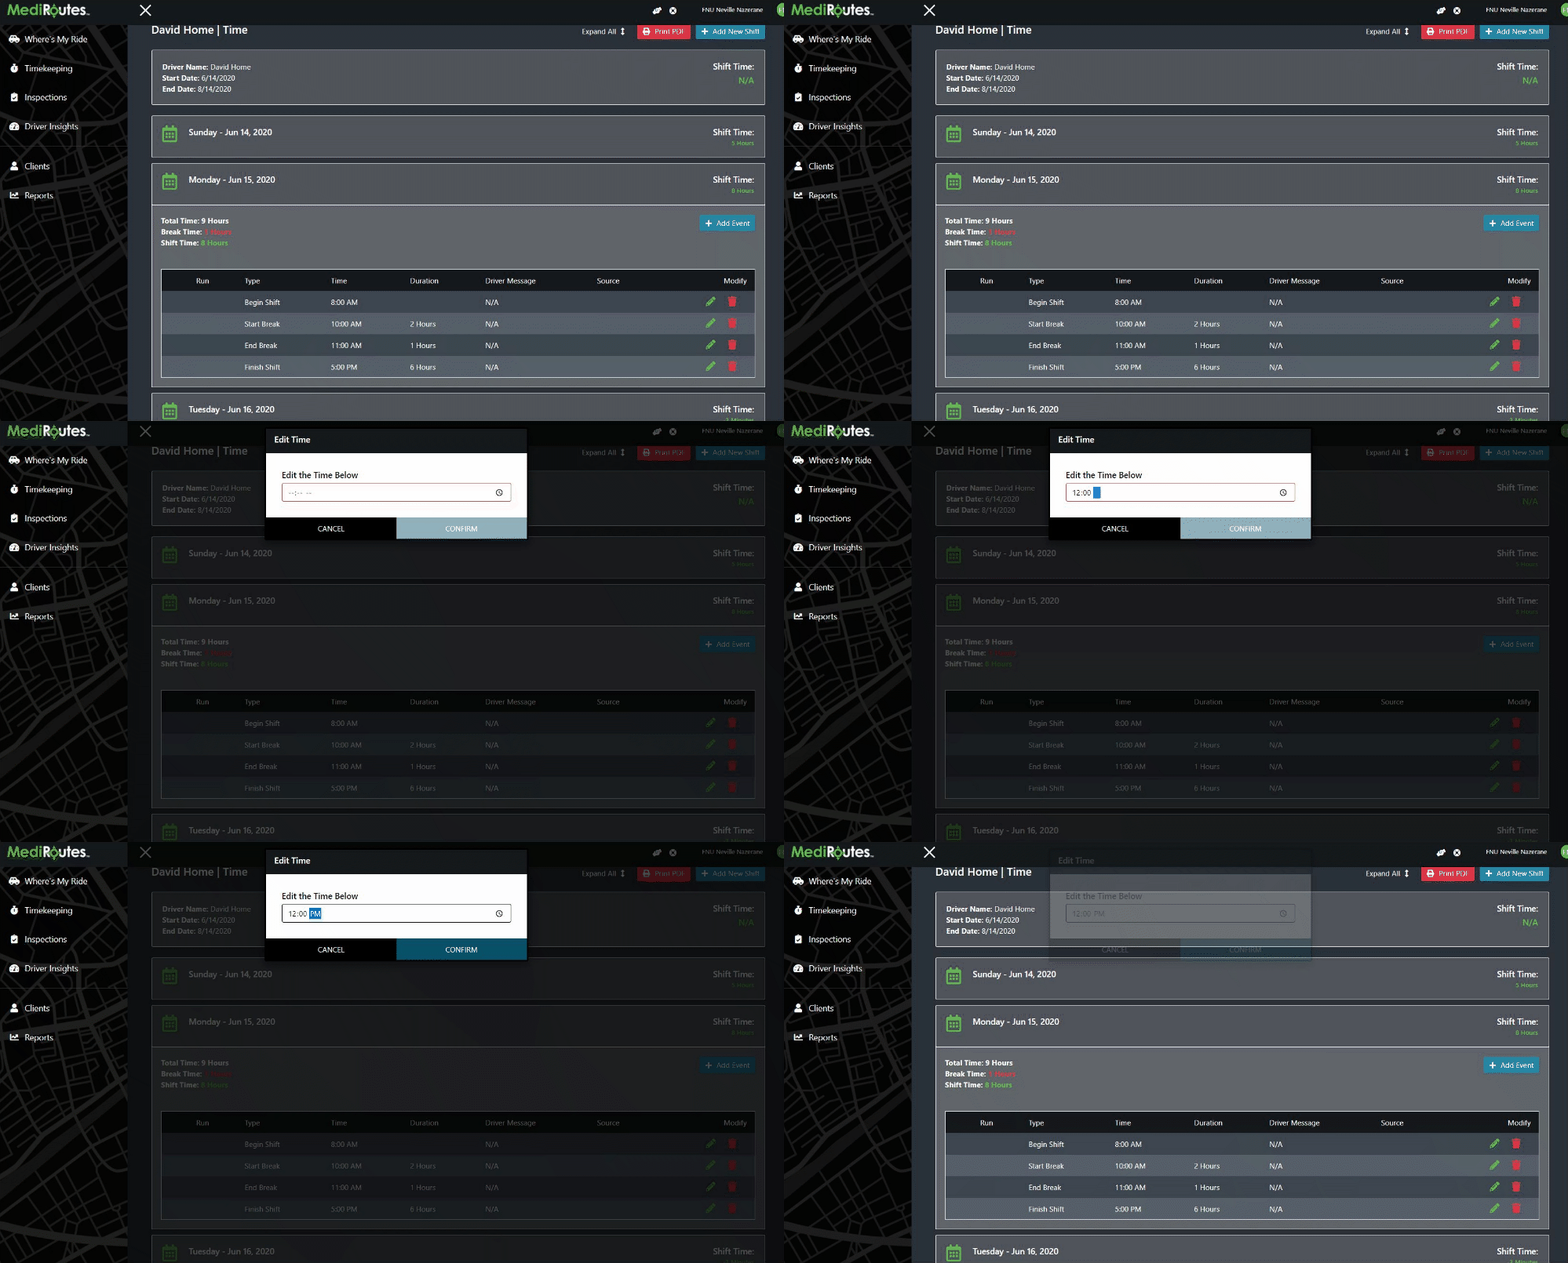
We can see below that the break time has been successfully edited.
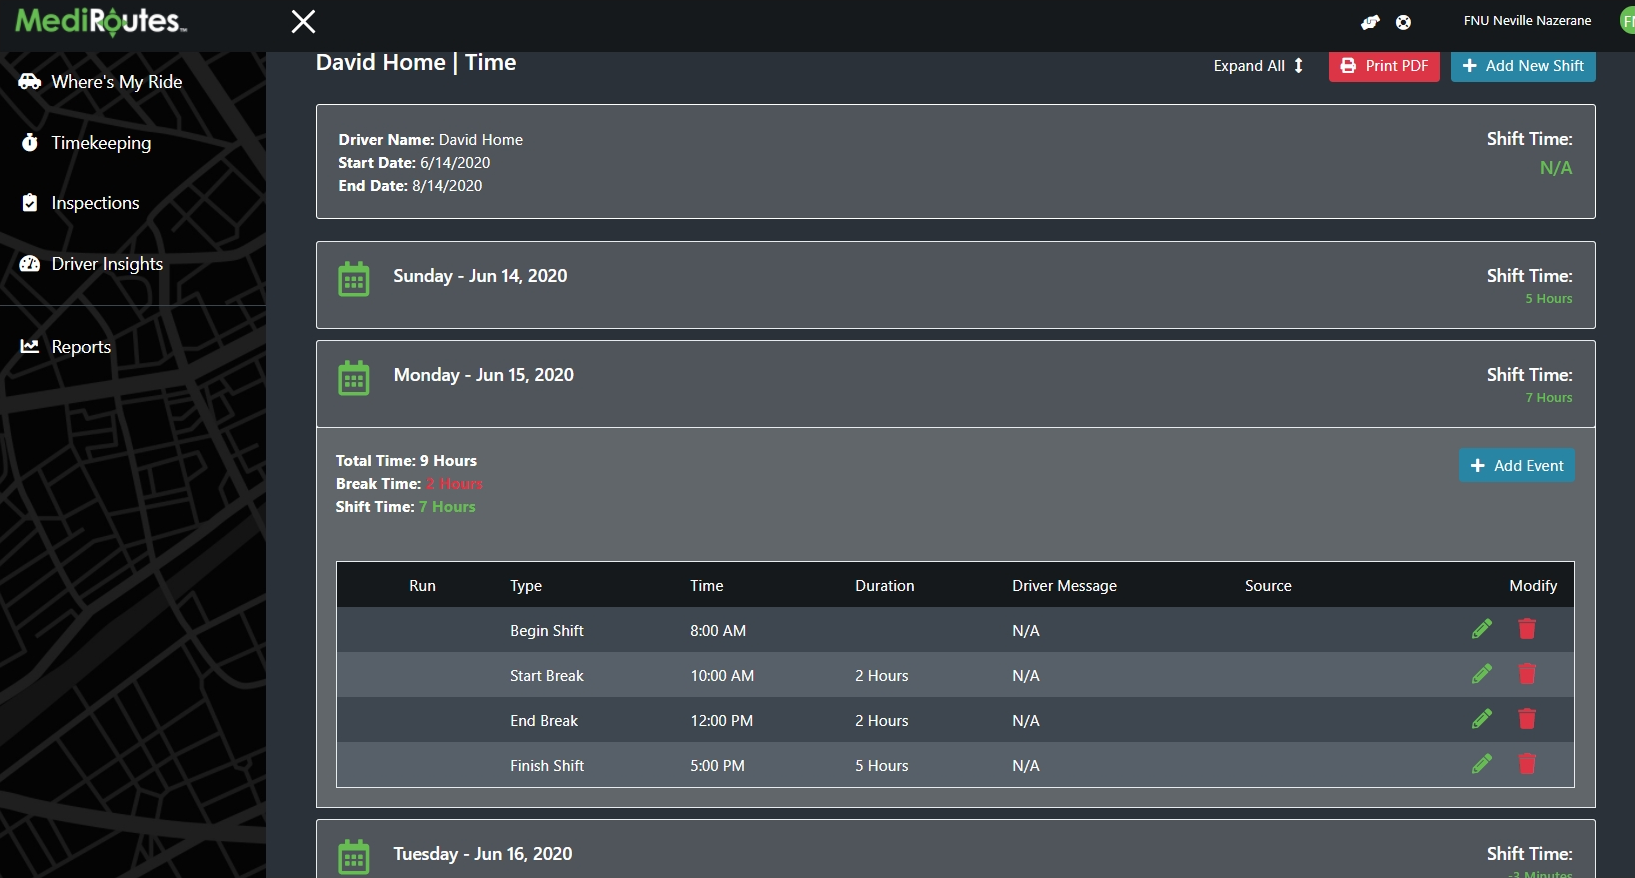
Step 8
By clicking the red Employee Timecards button users can see a list of all employee's and their total hours for the selected date range.
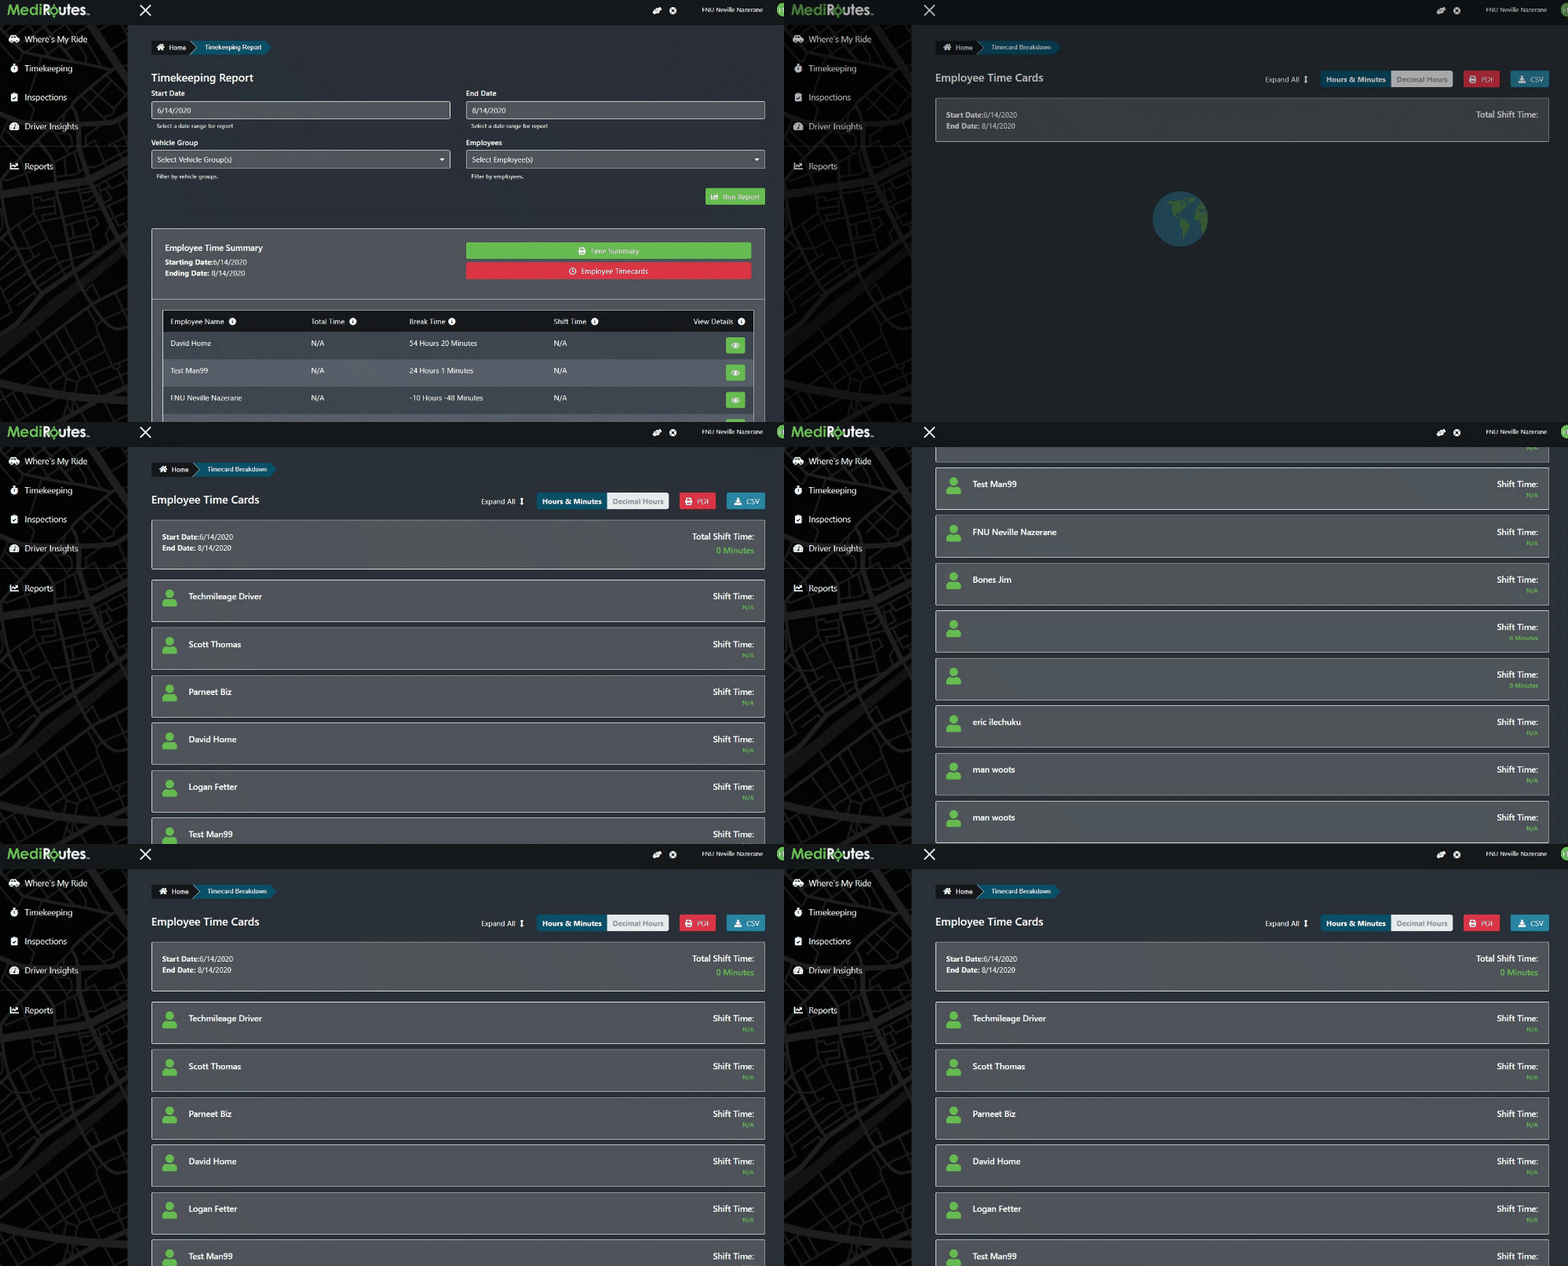
Step 9
If we click an employee, we can see a break down of their hours and other information. Clicking the blue View Details button will navigate back to the Employee Day View documented above.
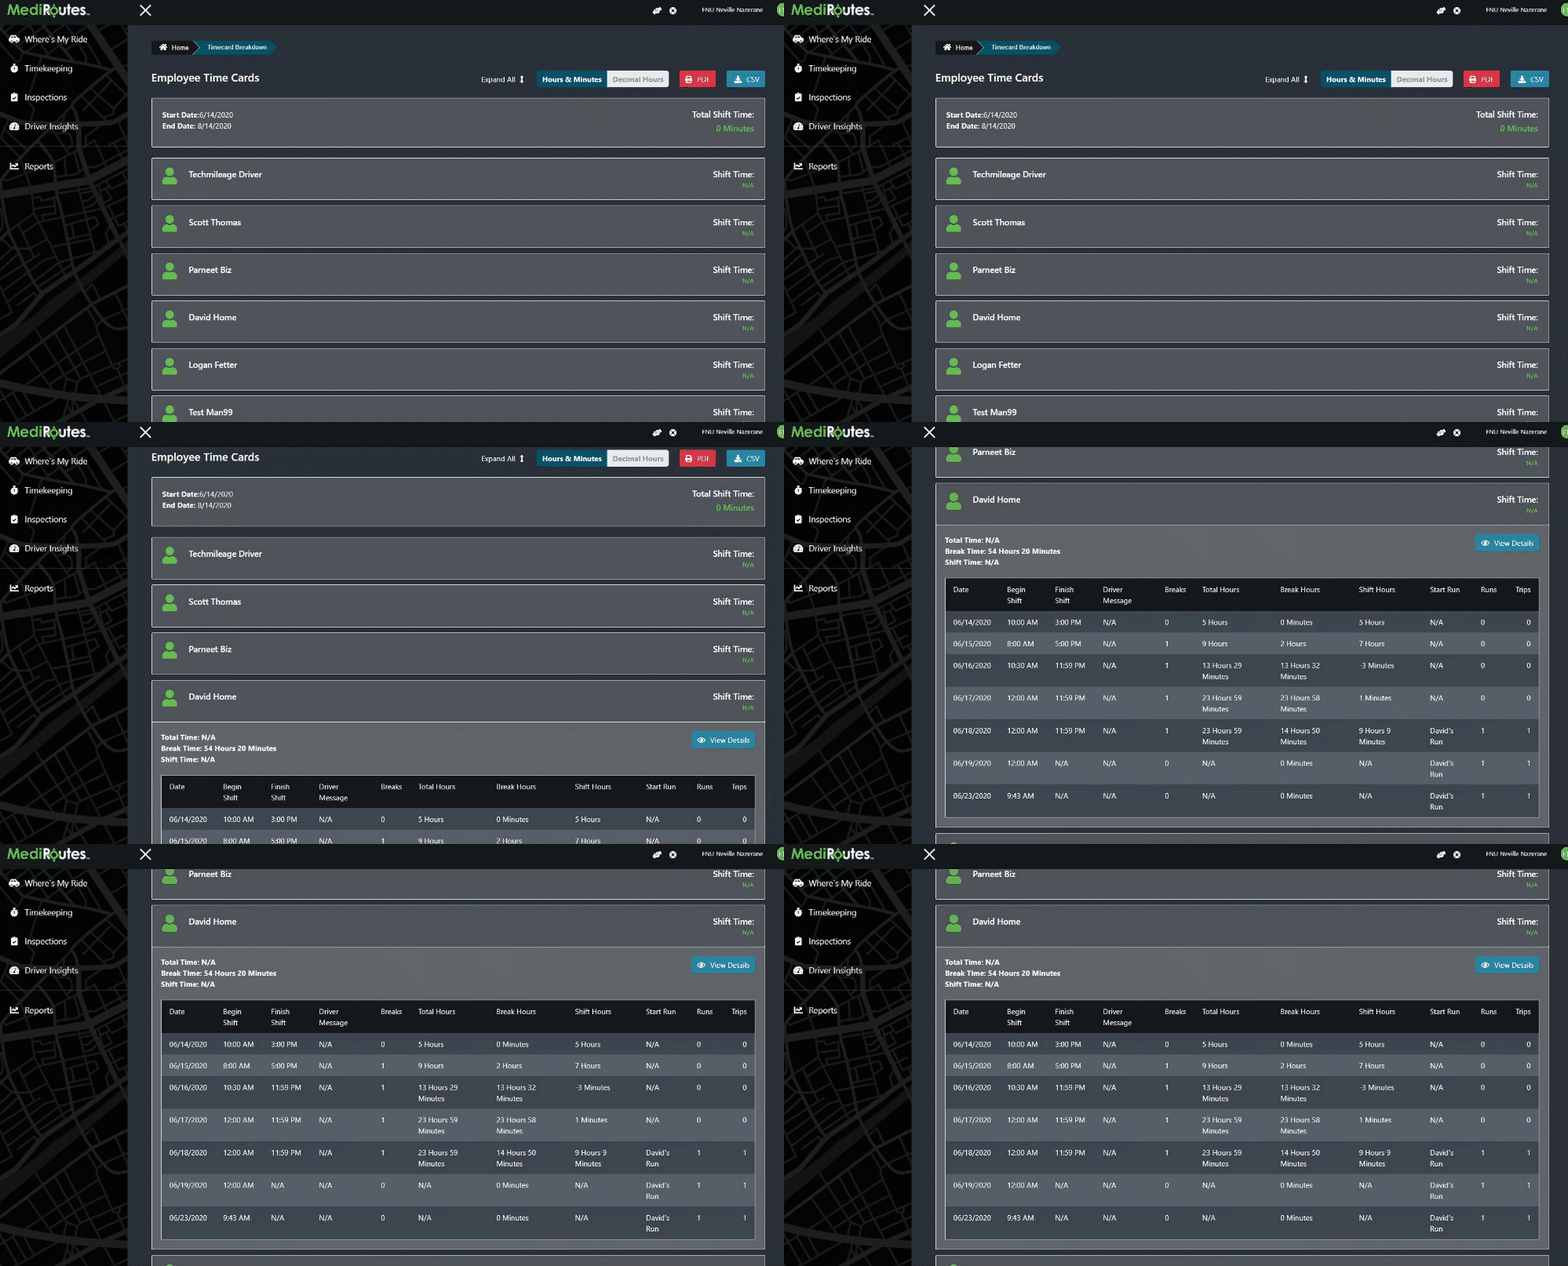
Step 10
We can toggle all time durations from Hours and Minutes View (easily read by humans), to Decimal Hours (easy to filter in the downloaded report).
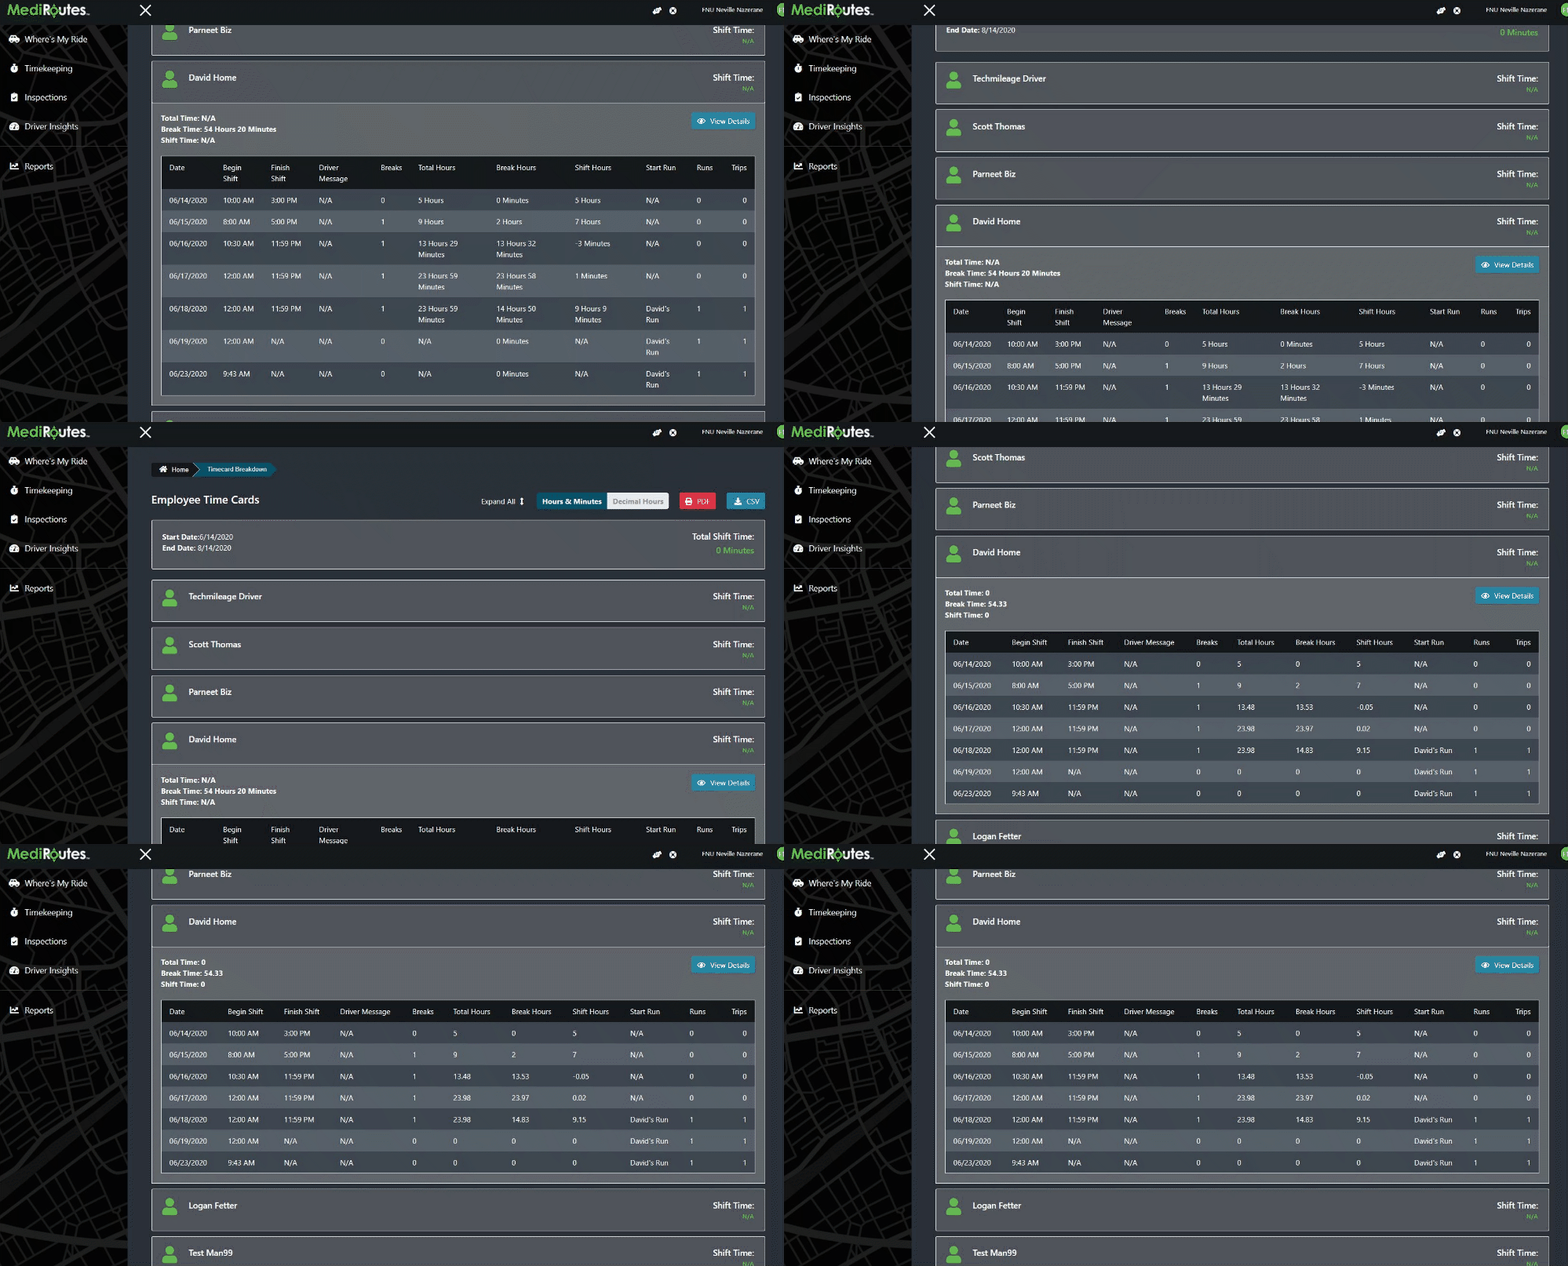
Step 11
Click the Download CSV button to download the report in Excel.
Note: Make sure to select Decimal Hours before clicking the Download CSV button.
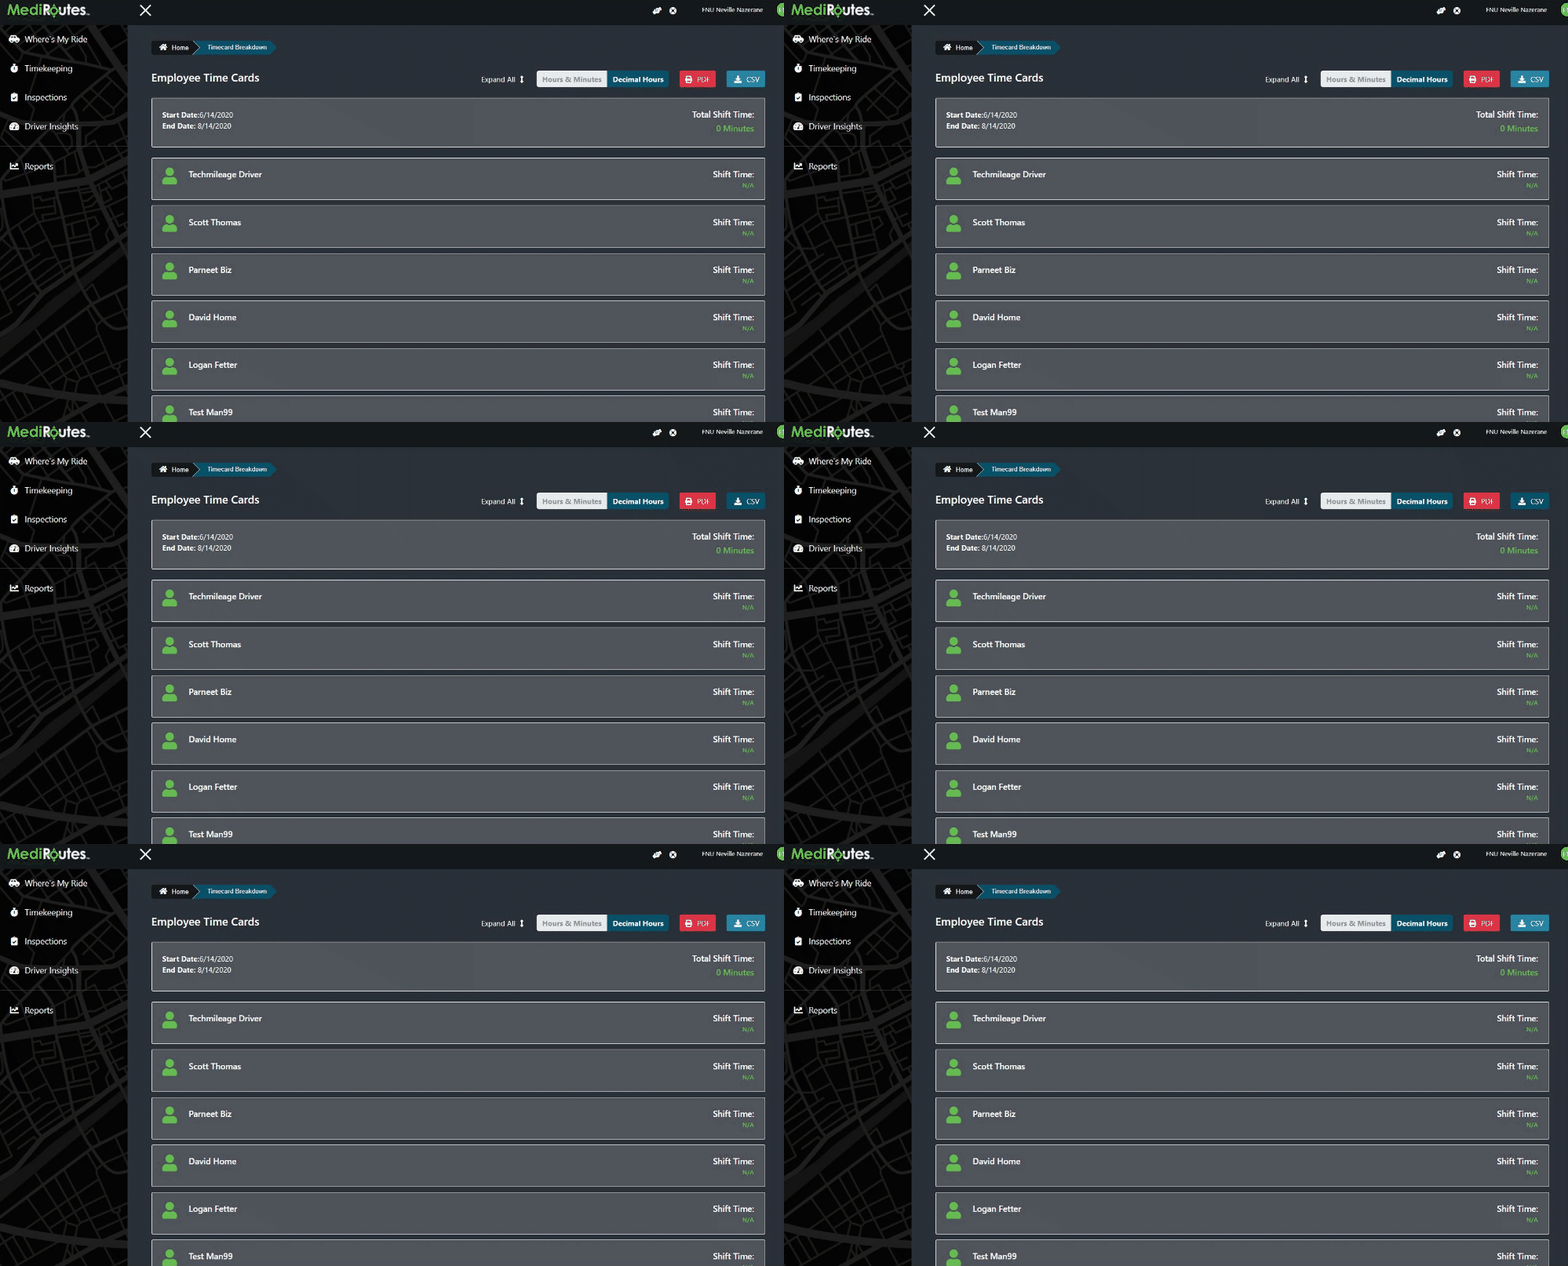
Step 12
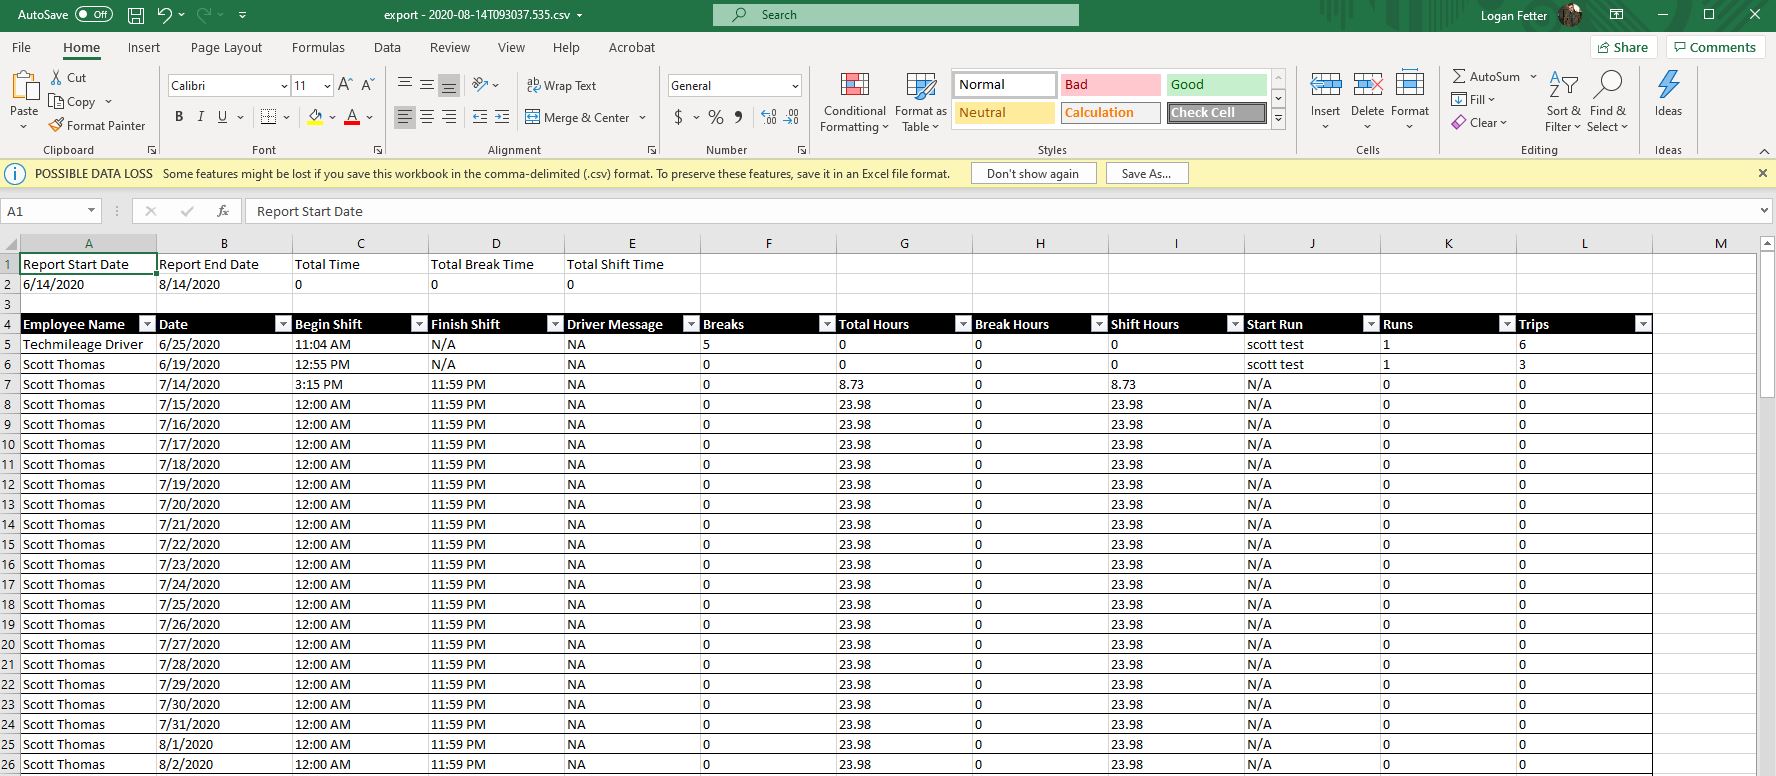
Below we can see the generated report.
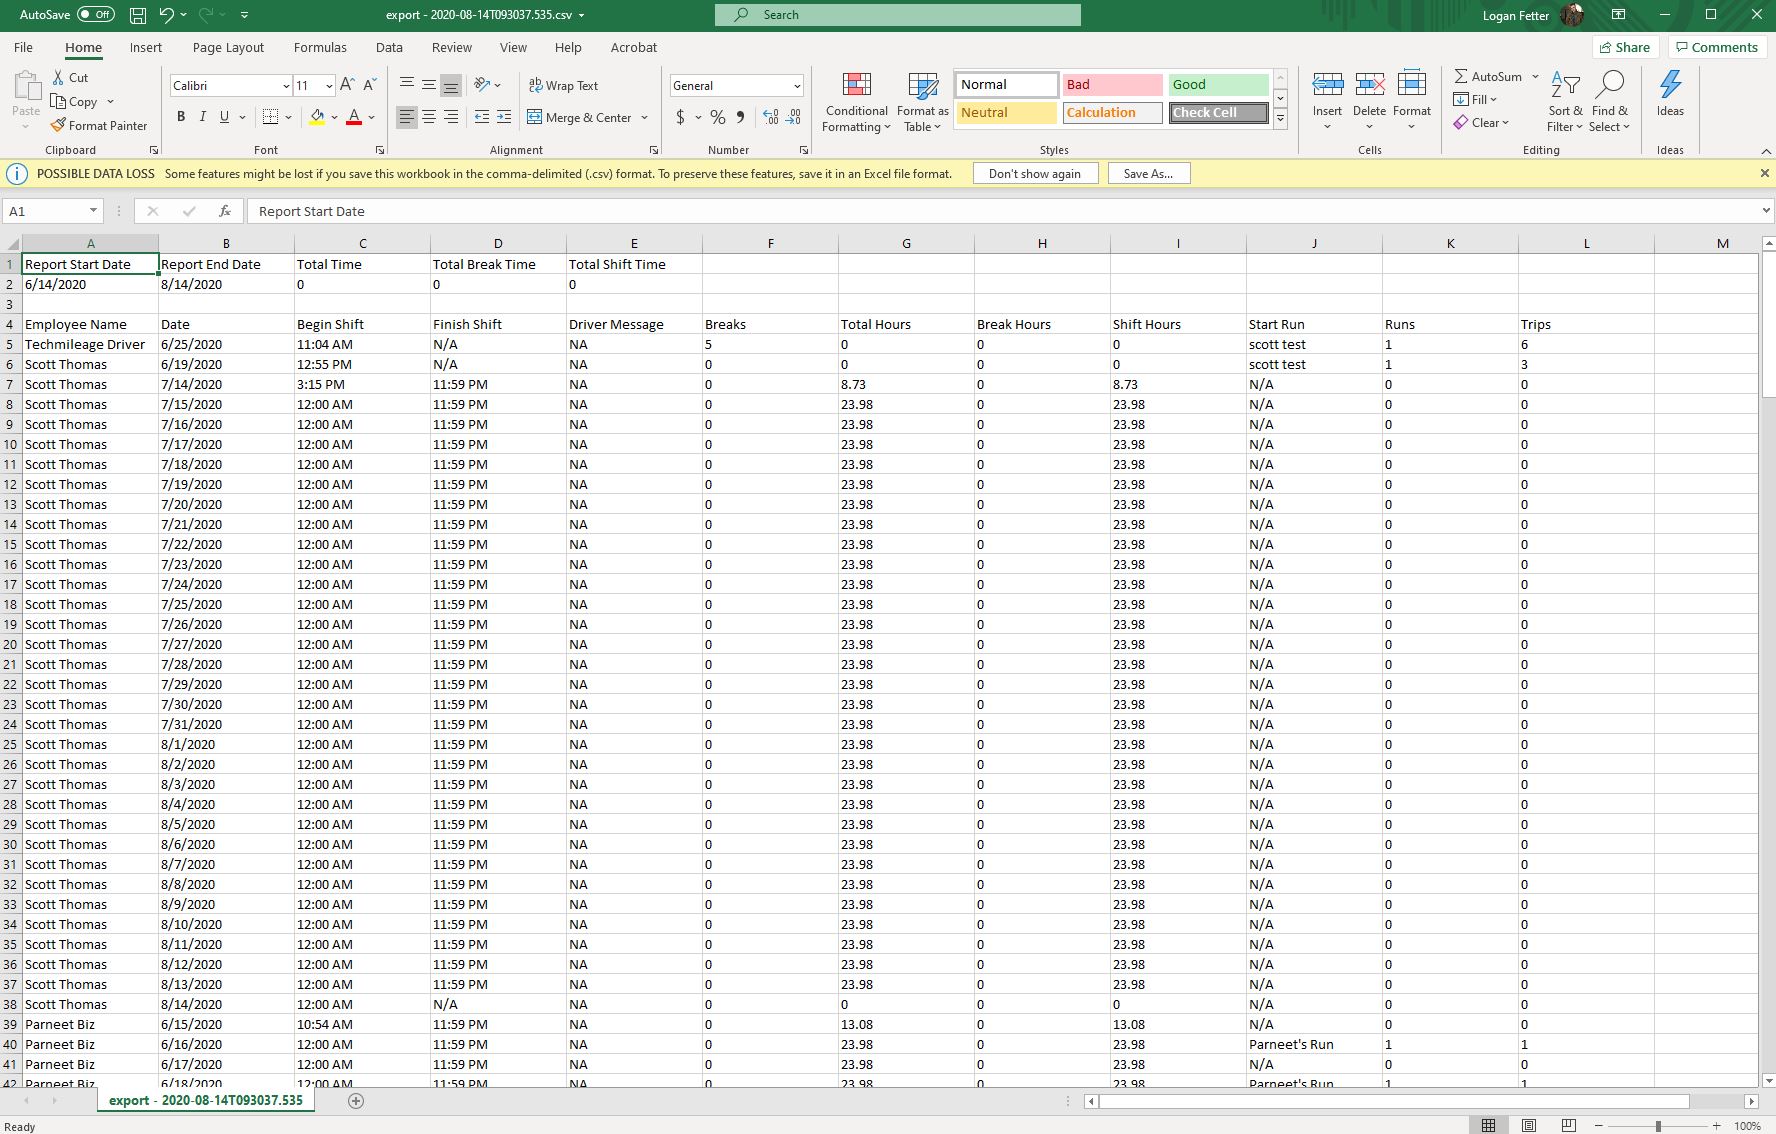
Note: To filter the data in Excel, highlight all table rows and headers and select "Format as Table". You will now be able to click the drop down arrow next to each table header and filter based on a selected option.
