Trip Intake
Trip Intake in the MediRoutes Web Application allows users to Create, View and Edit trips in a new streamlined way. We re-designed Trip Intake from the ground up so that it would work well on mobile devices and help guide the user through the creation process. Everytime a trip is created or edited in the web application, the same trip is created / modified in Desktop.
Key Features
- Create or Edit Trips
- View All Trips
- Filter by Name, SpaceType, or Funding Source
- Create Trip for Passenger from Passenger Summary Screen
Step 1 - Navigate to Trip Intake
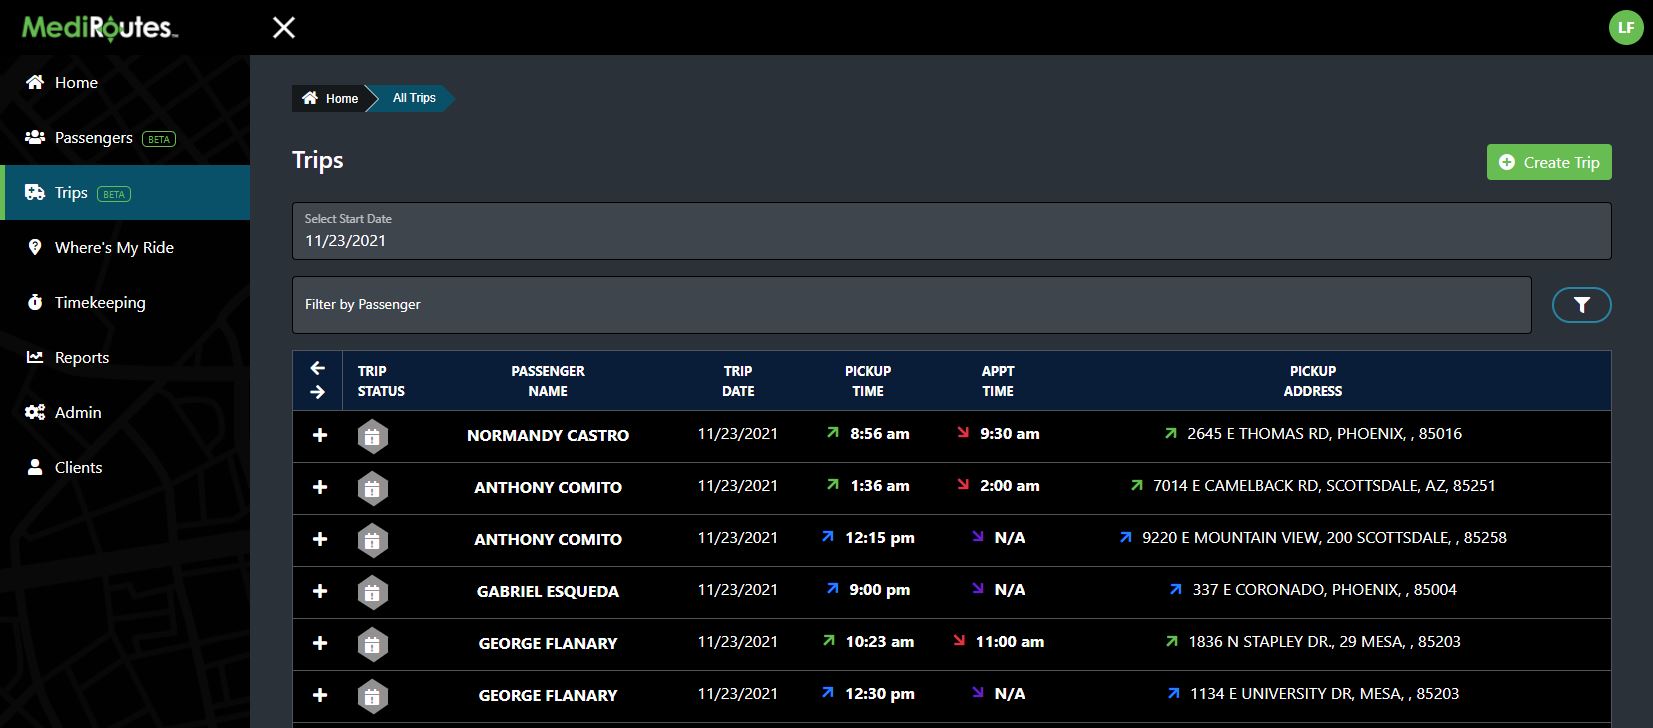
To access Trip Intake in Mediroutes click the Trips button in the navigation menu.
Step 2 - Search For Passenger
To create a trip, first select a passenger by searching for their name and selecting them in the dropdown list. To select the passenger, simply click on the passenger row in the dropdown list. If you would like to view passegner details from the trips screen, users can click the icon to reveal the passenger's details.


Step 3 - Select Passenger
Once you've searched for a passenger and selected them, MediRoutes will populate certain fields for the trip automatically if those details are available for the passenger.
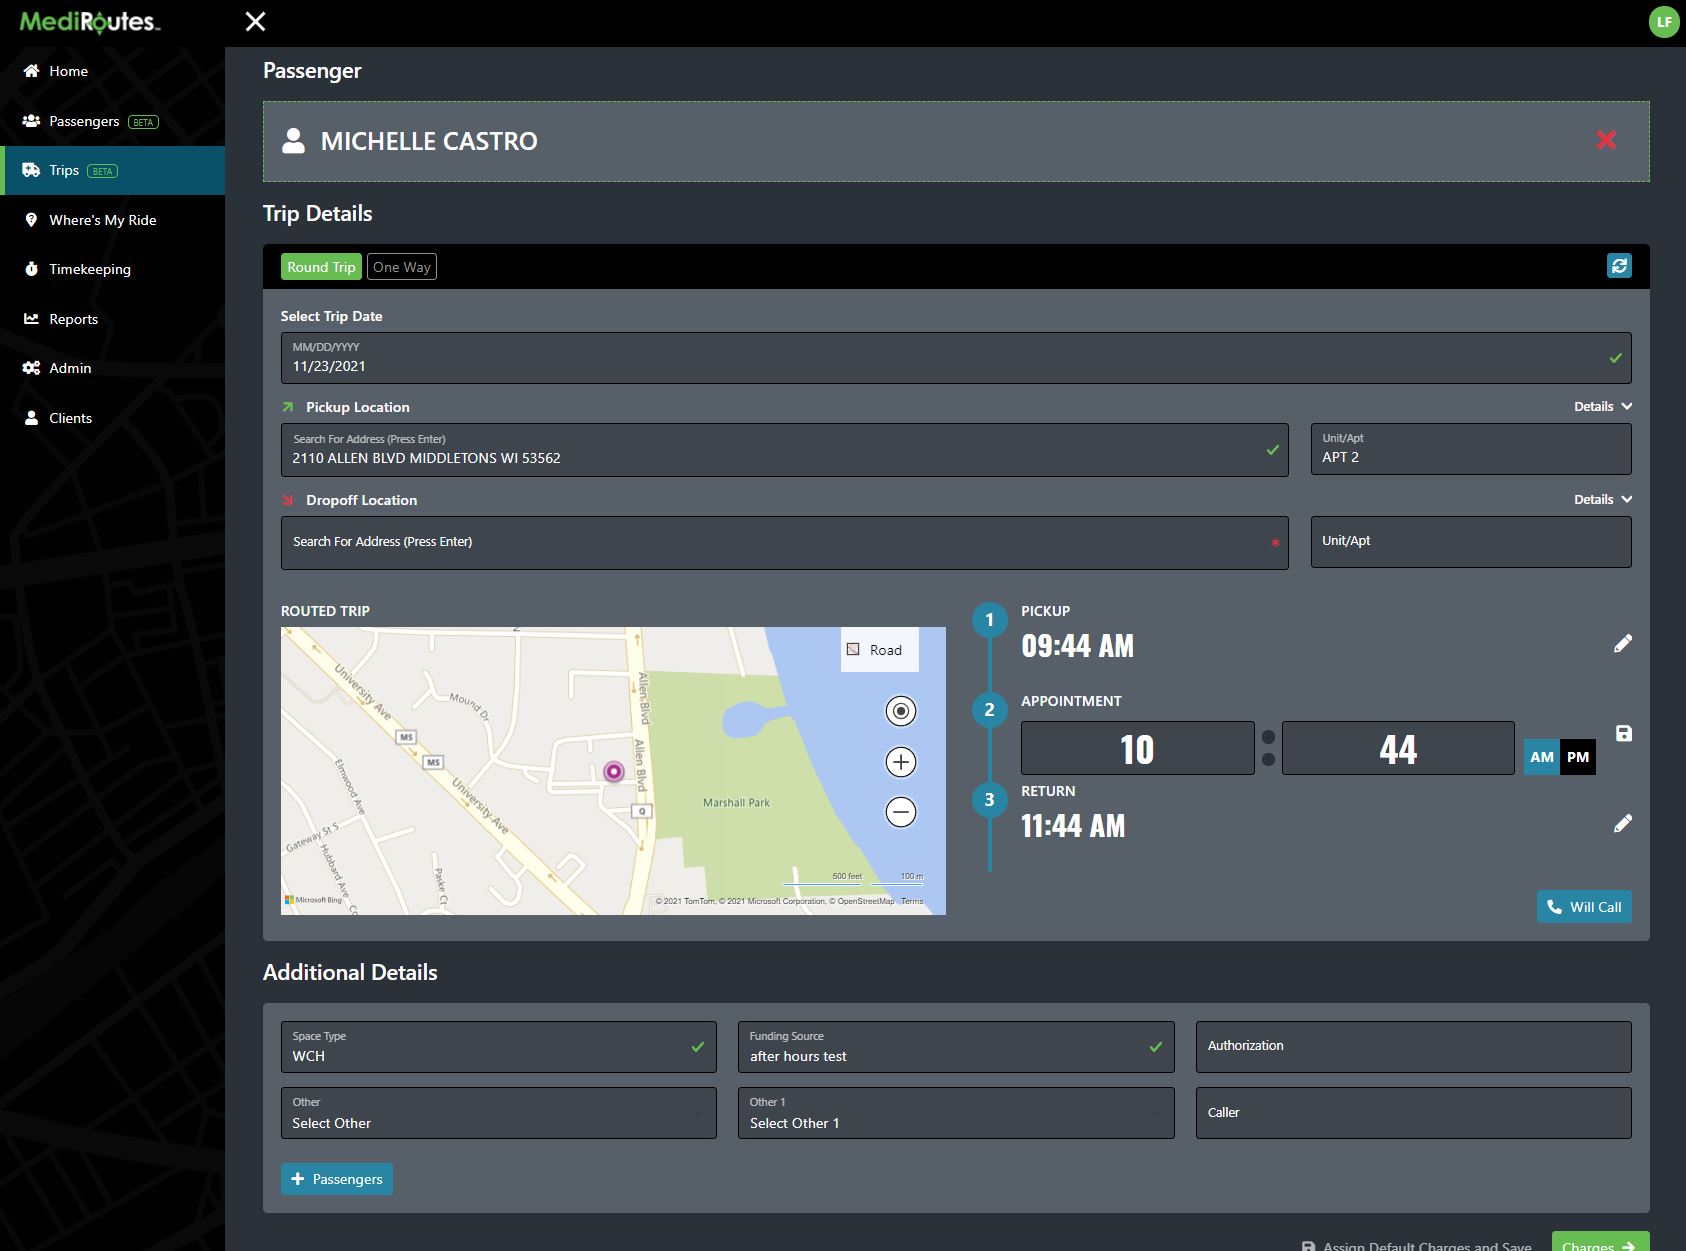
Which Fields Are Automatically Populated?
- Passenger Name
- Trip Date Defaults to Today
- Pickup Address (Passenger Home Address)
- Pickup Phone
- Pickup Comment
- Space Type
- Funding Source
- The Appointment Time is Set to the Current Time
Users can always overwrite the defaulted values at any time. We default these values as they are the most commonly used options and help to create trips more quickly.
Search For Another Passenger
To search for another passenger, users can click the icon, to clear the selected passenger and search again.

Step 4 - Fill in Your Required Fields
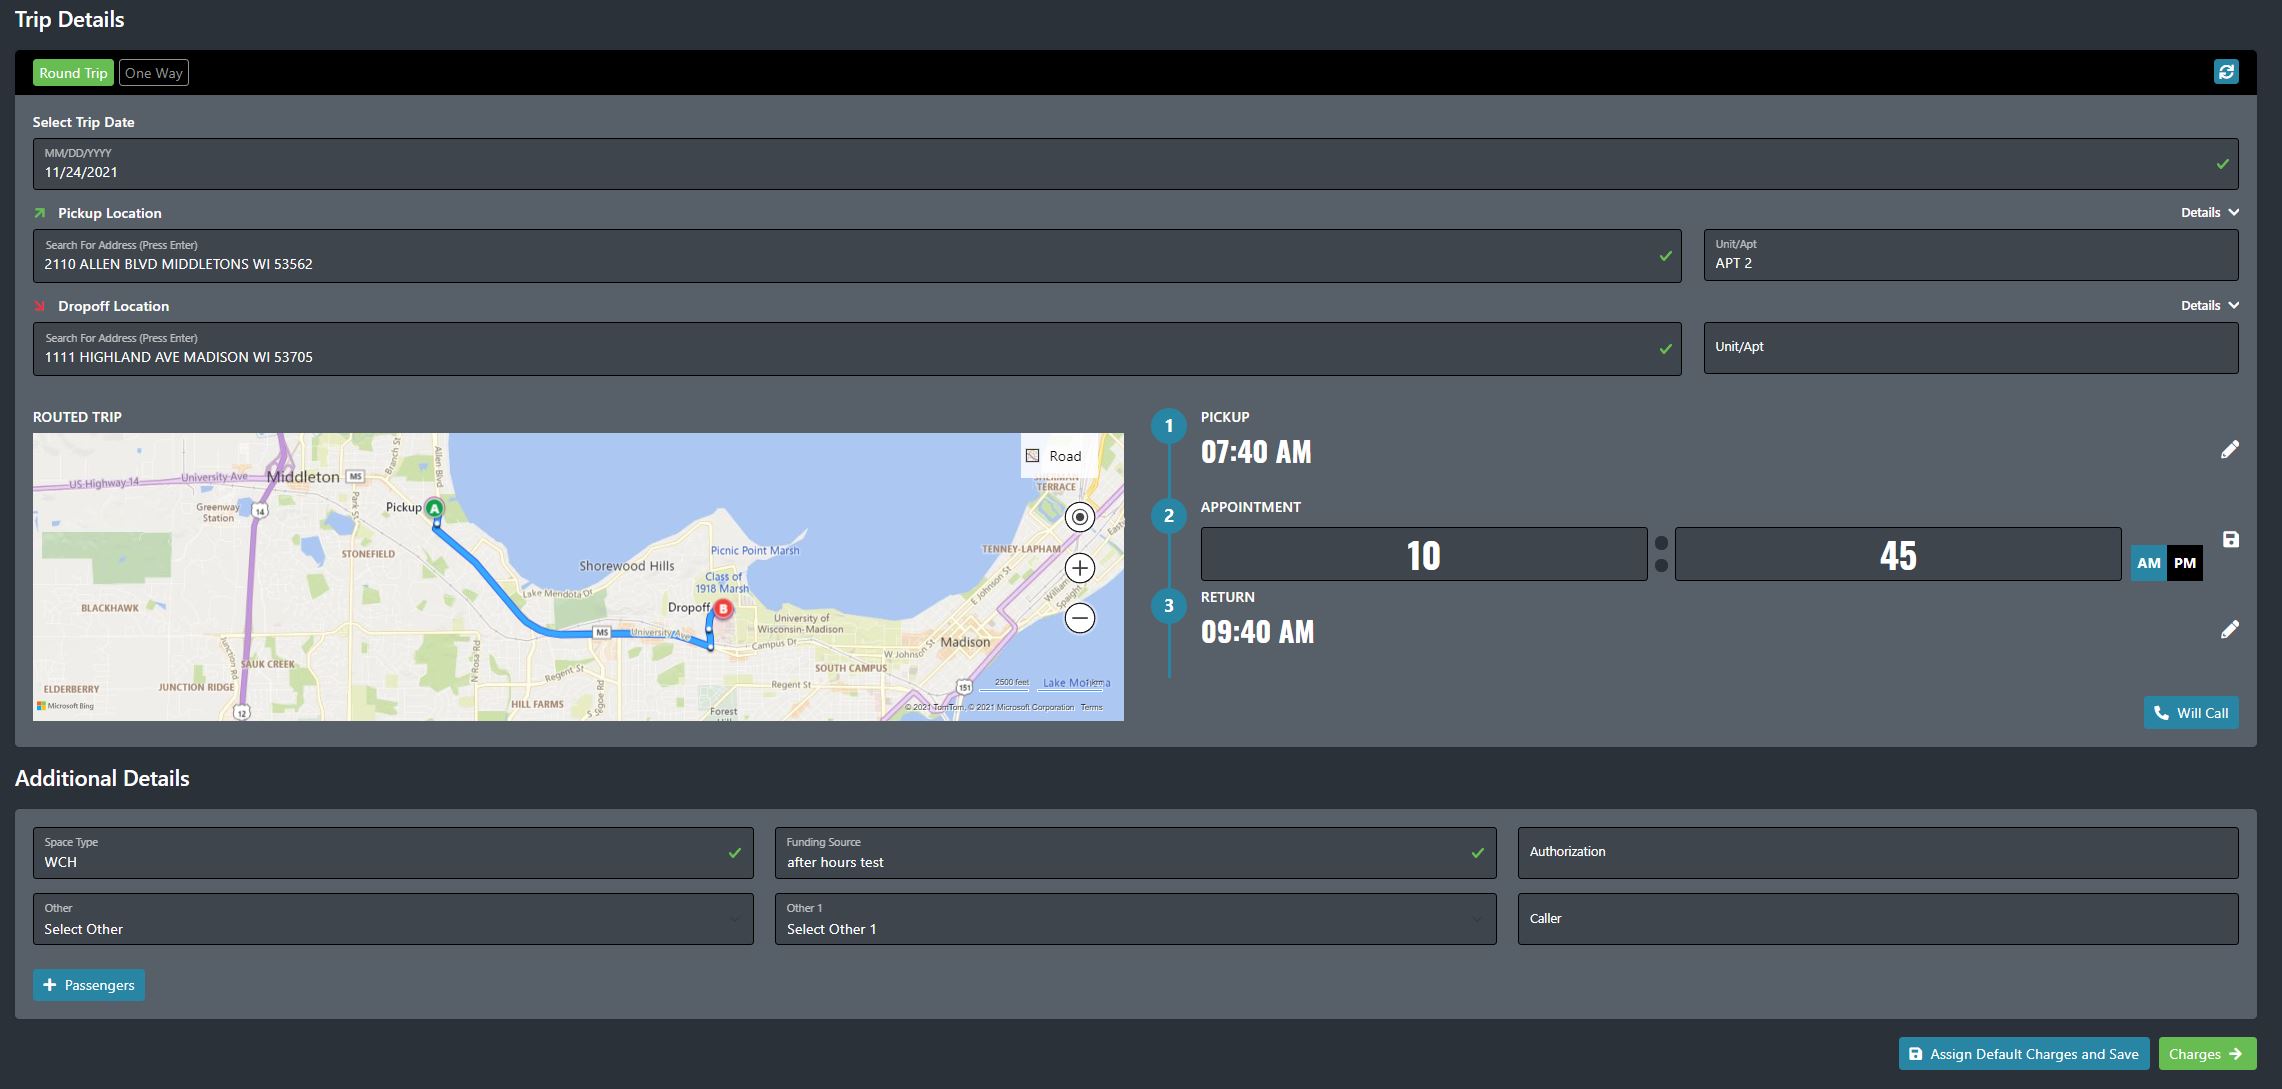
When building a trip there's quite a few options to fill in. Some of the fields are required and will not let you proceed to the next Trip creation step without entering those fields. Any field with are Required Fields. When you've successfully entered the required fields the icon will change from a red asterisk to a green as shown in the image below.
Step 5 - Optional Fields
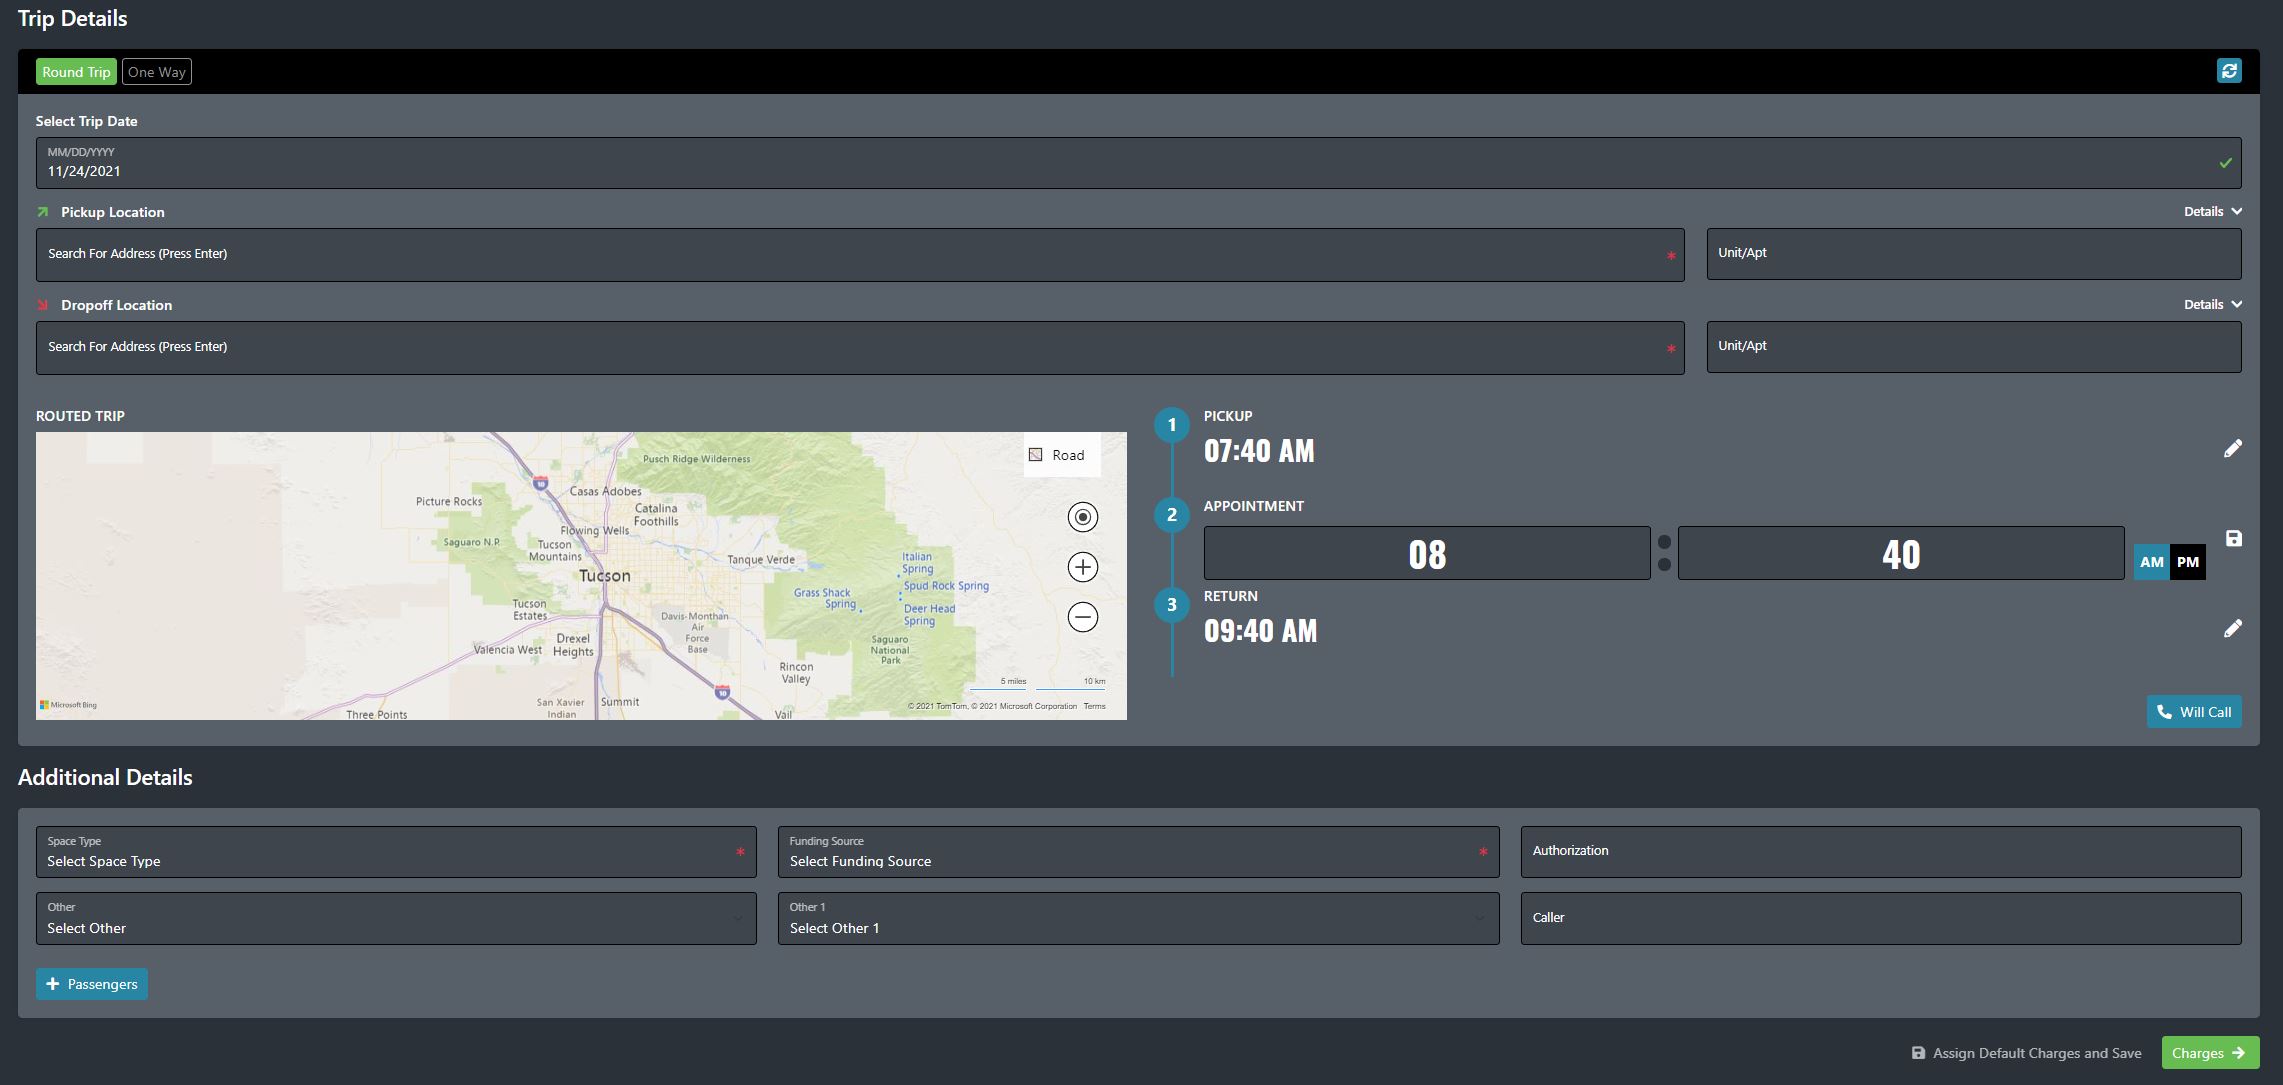
Not every field is required when creating a trip but there may be fields that you wish to add such as the Dropoff Phone Number and Comment. Lets look at all the available options for creating a trip.
Setting Round Trip
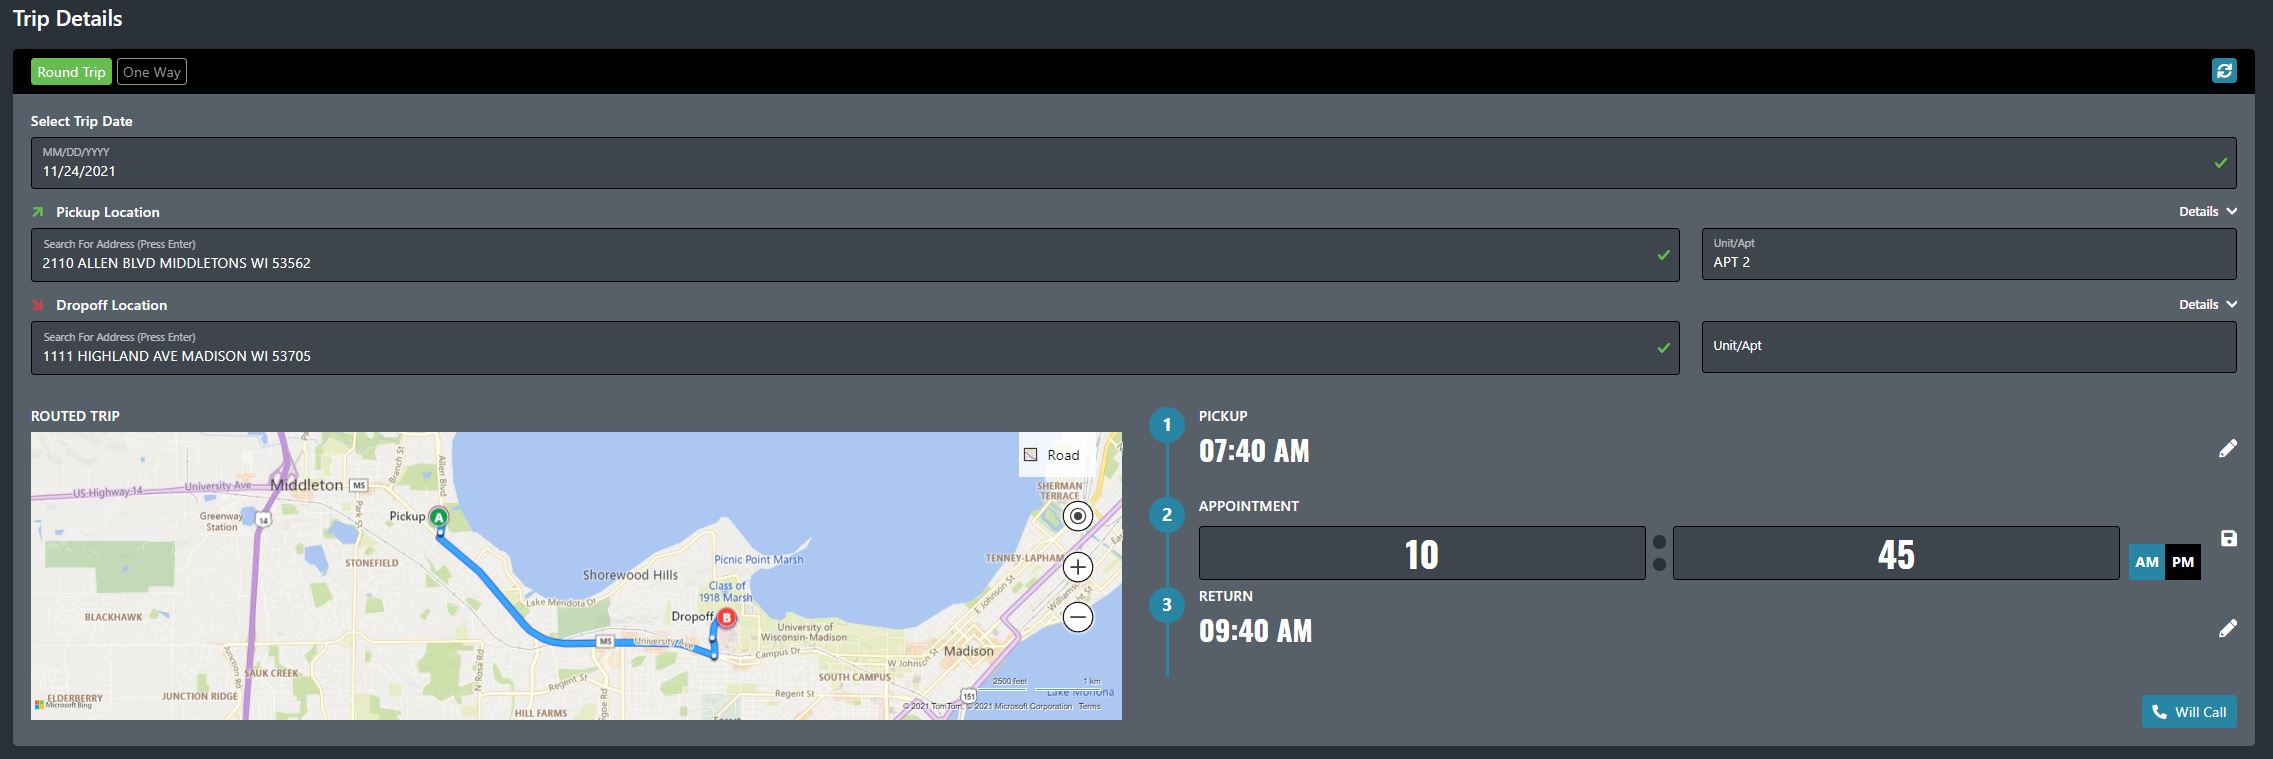
Every new trip will default as a Round Trip and the pickup and dropoff location will be reversed for the return trips. Simply set the appointment time and the Pickup & Return times will be auto-populated.
Set One Way Trip
To create a OneWay trip, click the One Way button in the Trip Details Header. Two other buttons will appear for Appointment Trip & Return Trip. We have currently selected the Appointment Trip. Notice below that the return time has been removed from the page.

We have selected the Return trip option below. Notice that only the Pickup Time is displayed.

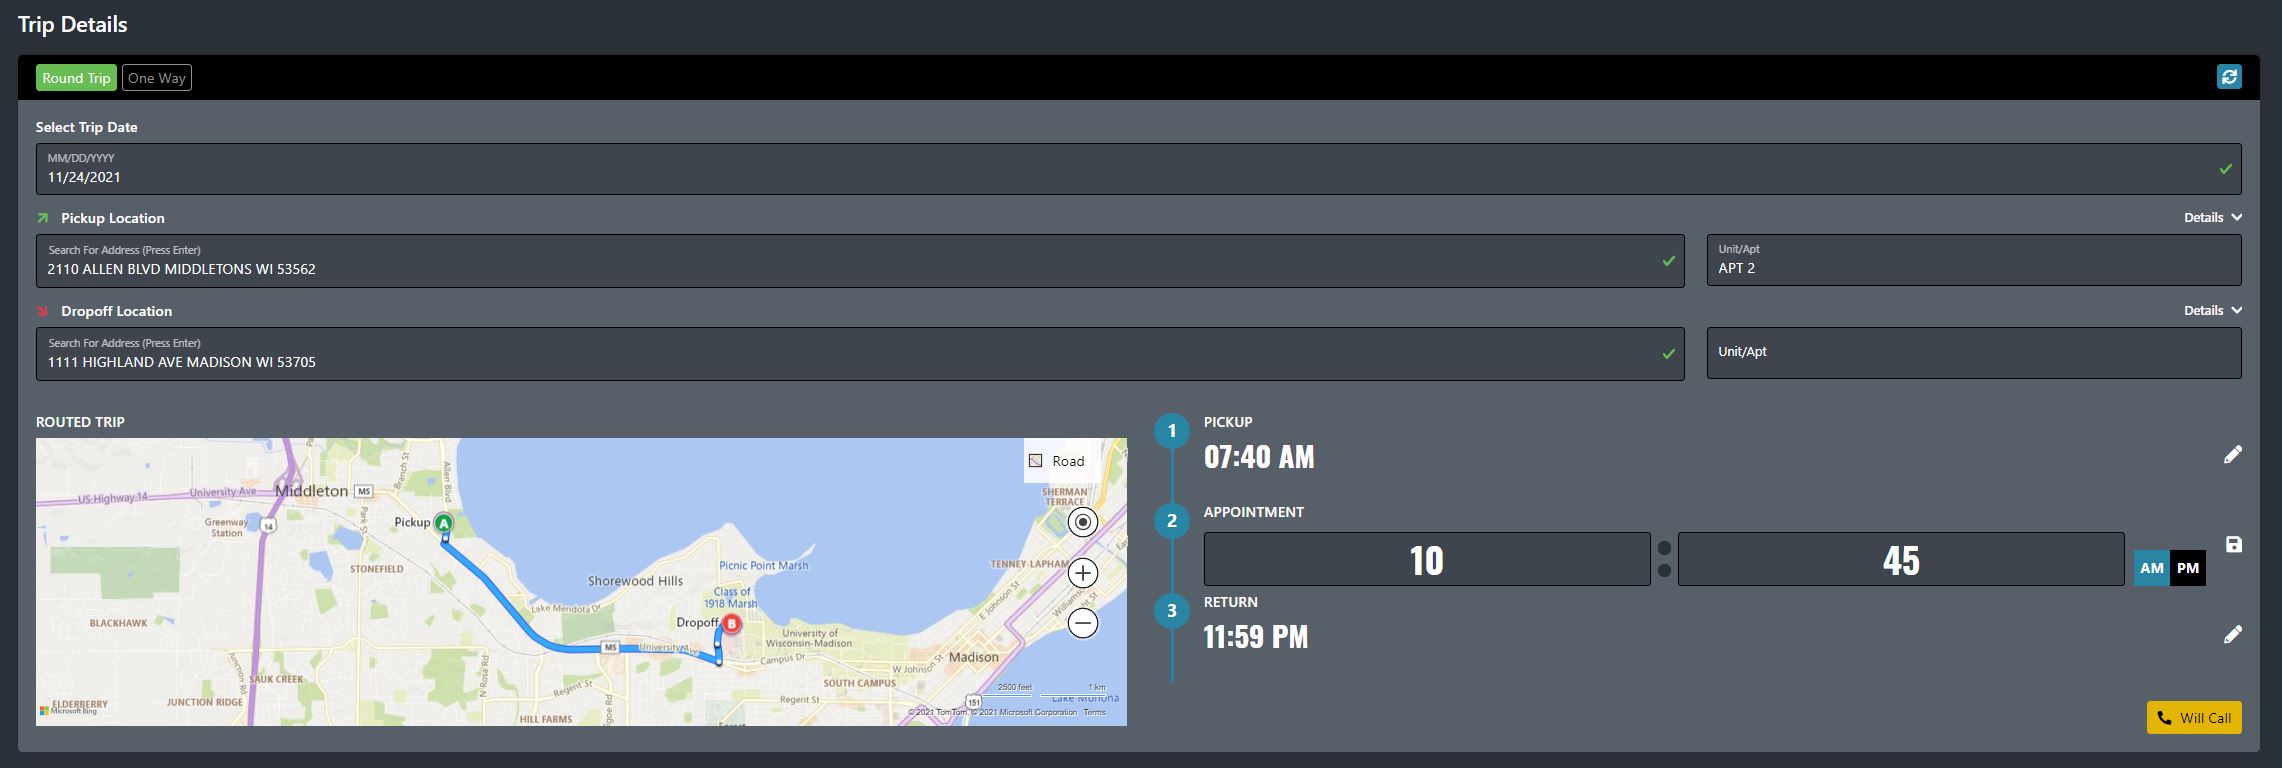
If the trip is a Will Call Trip, users can click the Will Call button. The will call button will be yellow when selected. The return time will be changed to 11:59 pm.
Setting Trip Date
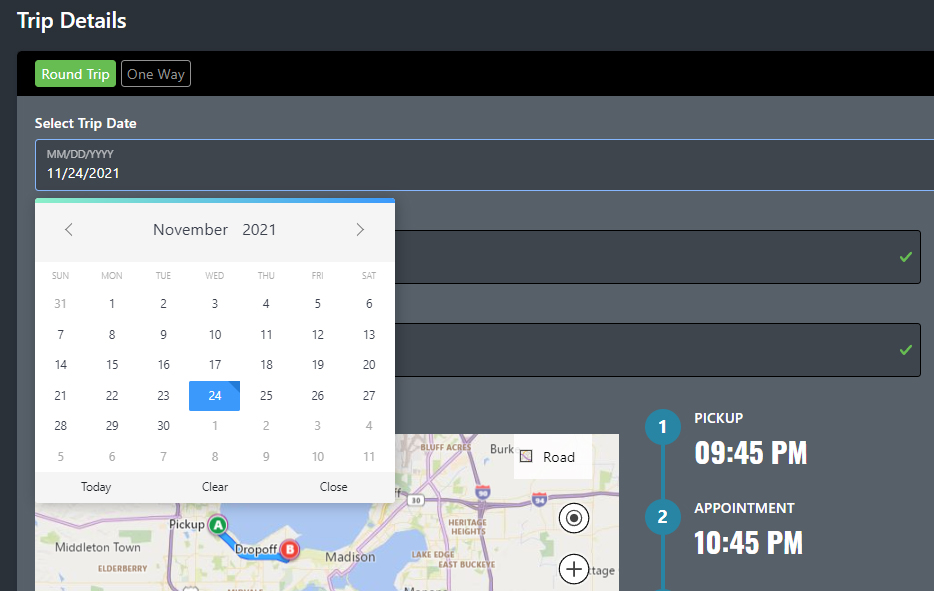
When creating a new trip, the date will always default to Today's Date. Users can select a future date by clicking on the Select Trip Date field and picking the trip date on our calendar widget.
Setting Appointment Time
To set the appointment time for the trip, enter your hours and minutes as shown below. You can toggle between AM/PM for the correct time-of-day. When you are finished entering the appointment time, click the icon to lock the trip time. The Pickup & Return time will adjust accordingly. You can edit any of the times by clicking the icon. This will re-enable the hour, minute and time-of-day controls.


Setting Additional Details
Some key details for the trip are Space Type and Funding Source. We will automatically add the Space Type & Funding Source when a passenger has been selected based on the passenger Space Type and Funding Source settings. Users can change the Space Type and Funding Source if required from the available dropdown list.
 Users can also add the following details:
- Authorization Number
- Caller
- Other / Other1
- Add Additional Passengers
Add Additional Passengers
To add an additional passenger, click the blue Passengers Button as shown below. Add the Space Type for the additional passenger and how many additional passengers there will be for that Space Type.

You can add a second space type by clicking the icon in the additional passengers header.

To remove an additional passenger, click the icon.
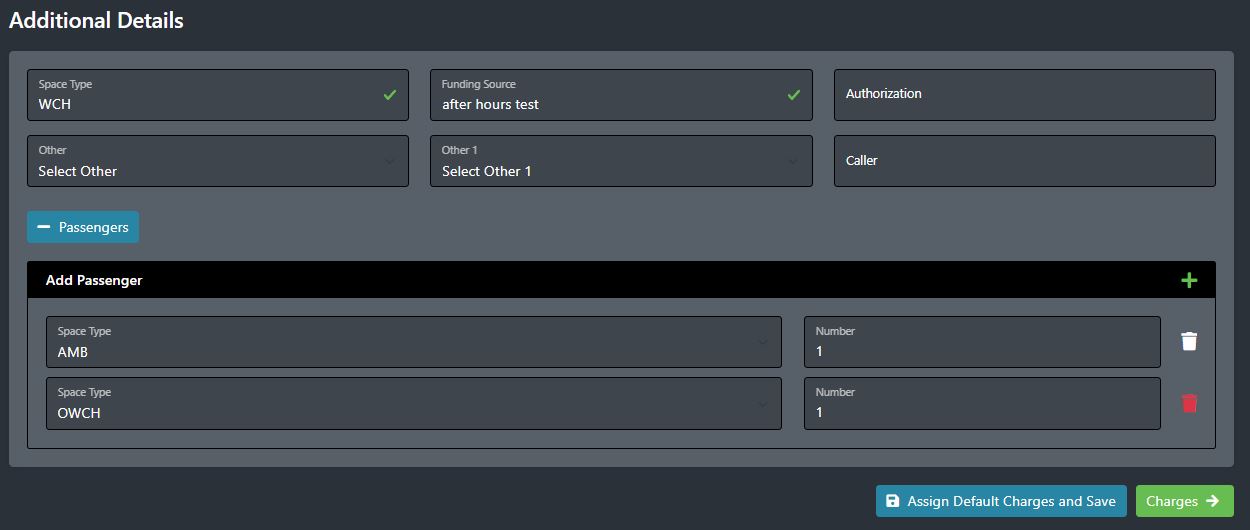
When the required fields have been entered, users can Save the Trip With Default Charges or proceed to the next section Charges.
Note
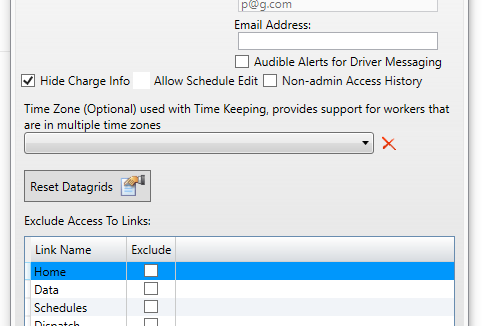
Only users who have access to see charges will be able to view or edit charges. These users instead can Save the Trip With Default Charges on Step 1, or they will be guided to Step 3 for the final summary page where they can save the trip.
Step 5 - Proceed to Trip Charges
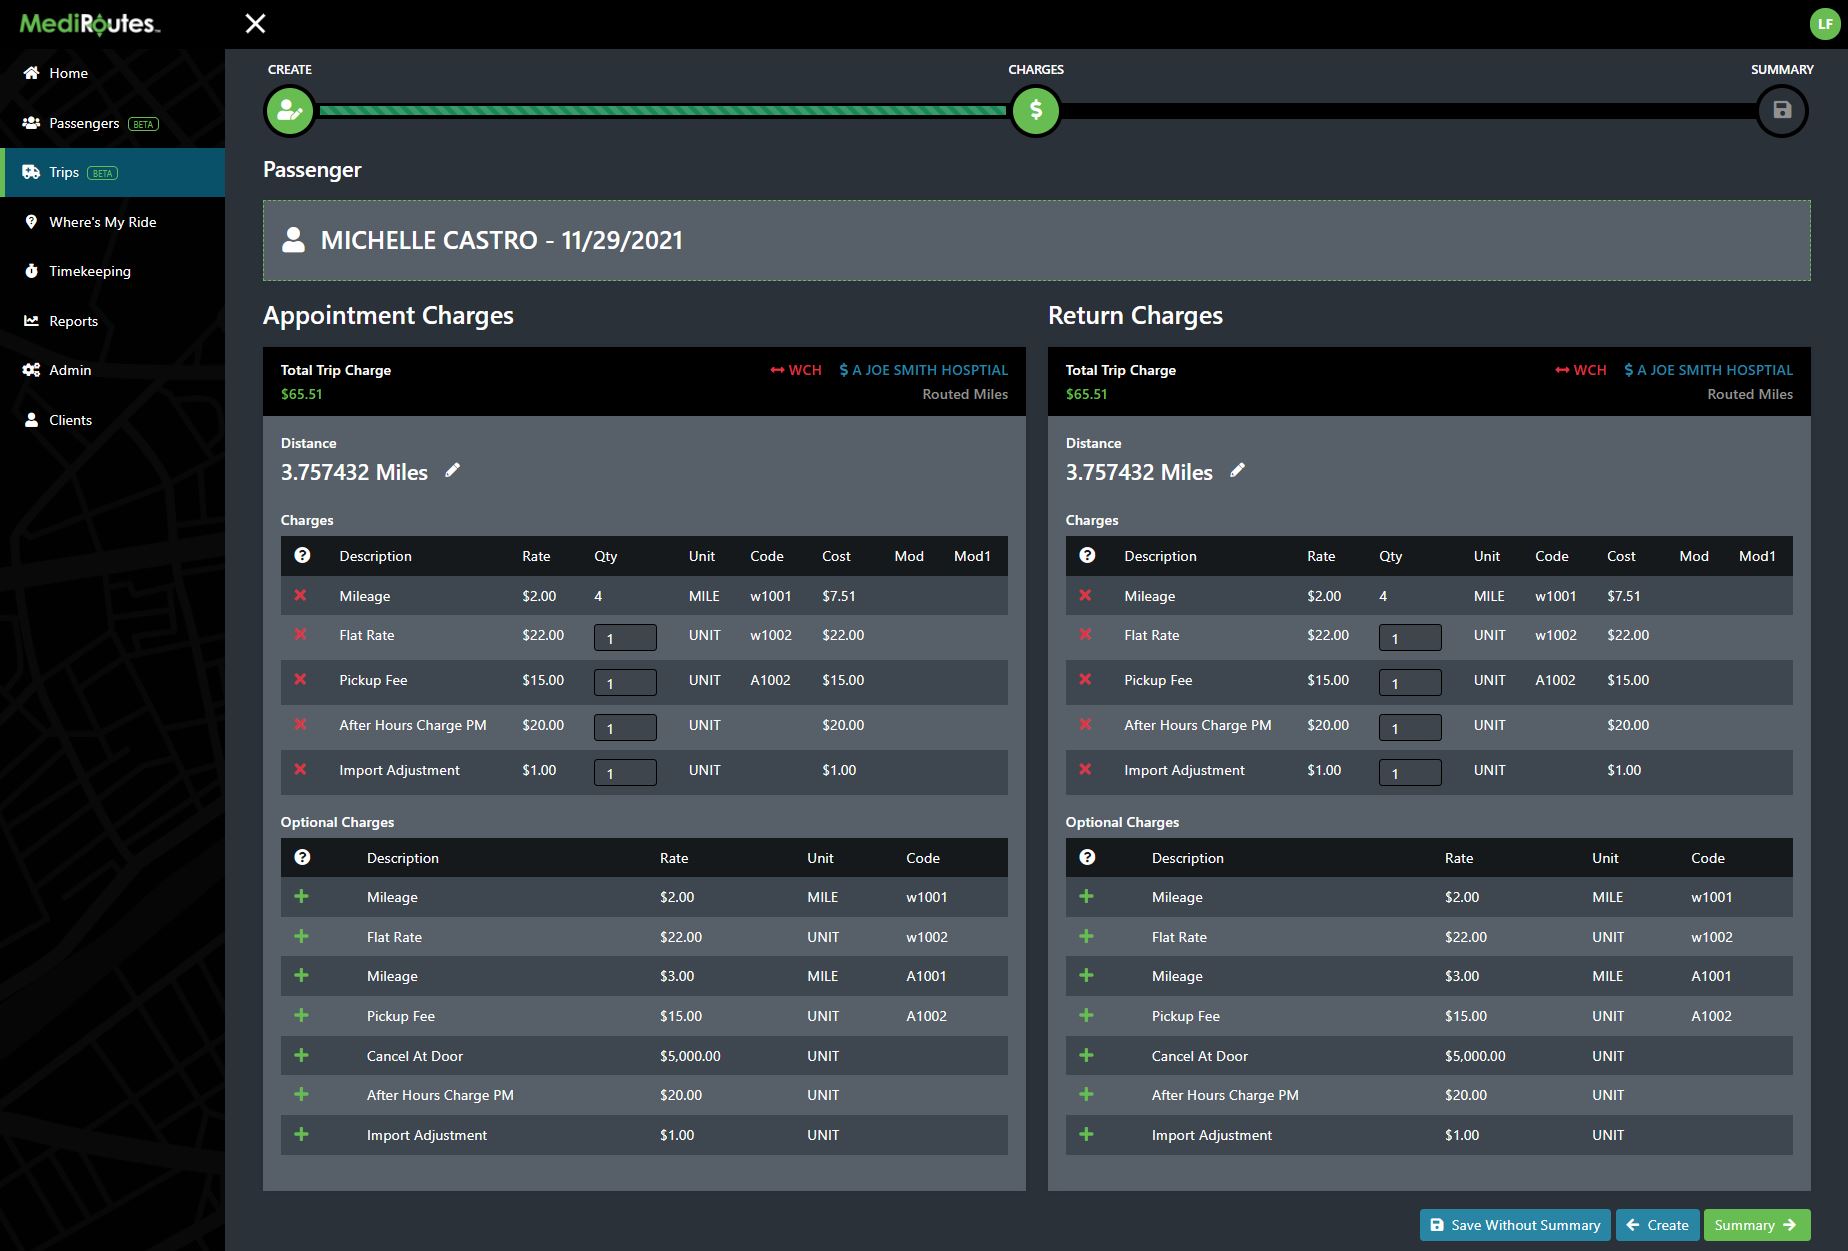
After landing on the Trip Charges section the user will be able to see all of the default and optional charges for the trip. These charges are based on the Funding Source that was selected for the passenger. If the trip is a Round Trip, there will be charges for both Appointment and Return. If the trip is a One-Way trip then only one trip charges box will be shown for either the Appointment Trip or Return trip respectively.
The header of each trip charge box will have key information about the trip and charge such as:
- Total Trip Cost
- Space Type
- Funding Source

Editing Trip Charges
Users have several options from within the Trip Charges section You can:
- Change the quantity of each individual trip charge
- Remove Default Charges by clicking the icon
- Add Optional Charges by clicking the icon
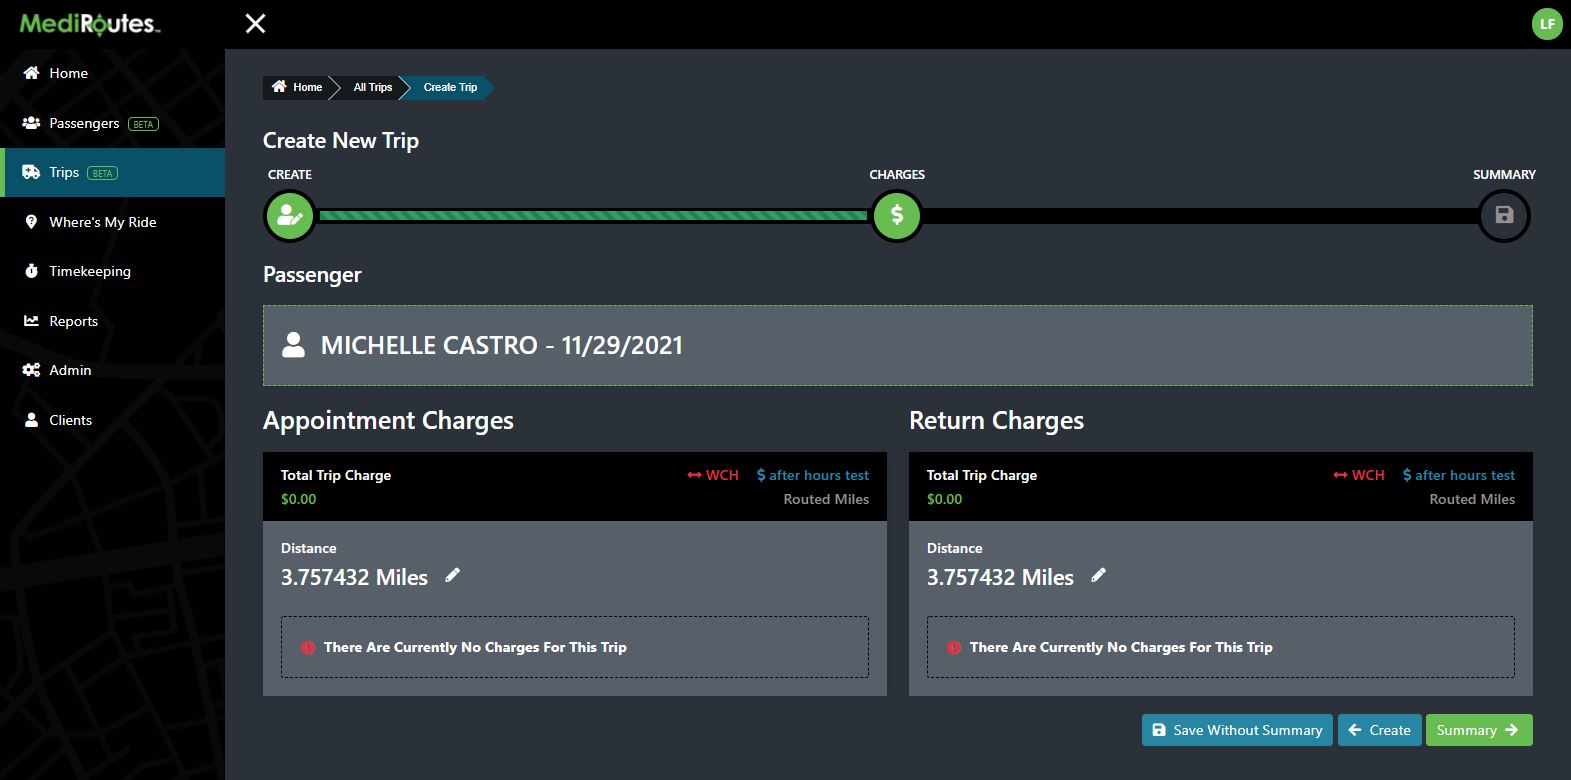
If there are no trip charges the screen below will display as a $0 trip with no default or optional charges. You can set up trip charges at the funding source level in the Desktop Application.
When finished editing trip charges, you can save the trip directly by clicking the blue Save Without Summary button, or proceed to the final Summary page to review the trip before saving.
Step 6 - Proceed to Trip Summary
The Trip Summary page is an overview of the entire trip being created. This screen is ideal for making sure that we fill in all the fields we intended to fill in, and gives a nice visual preview for the trip.
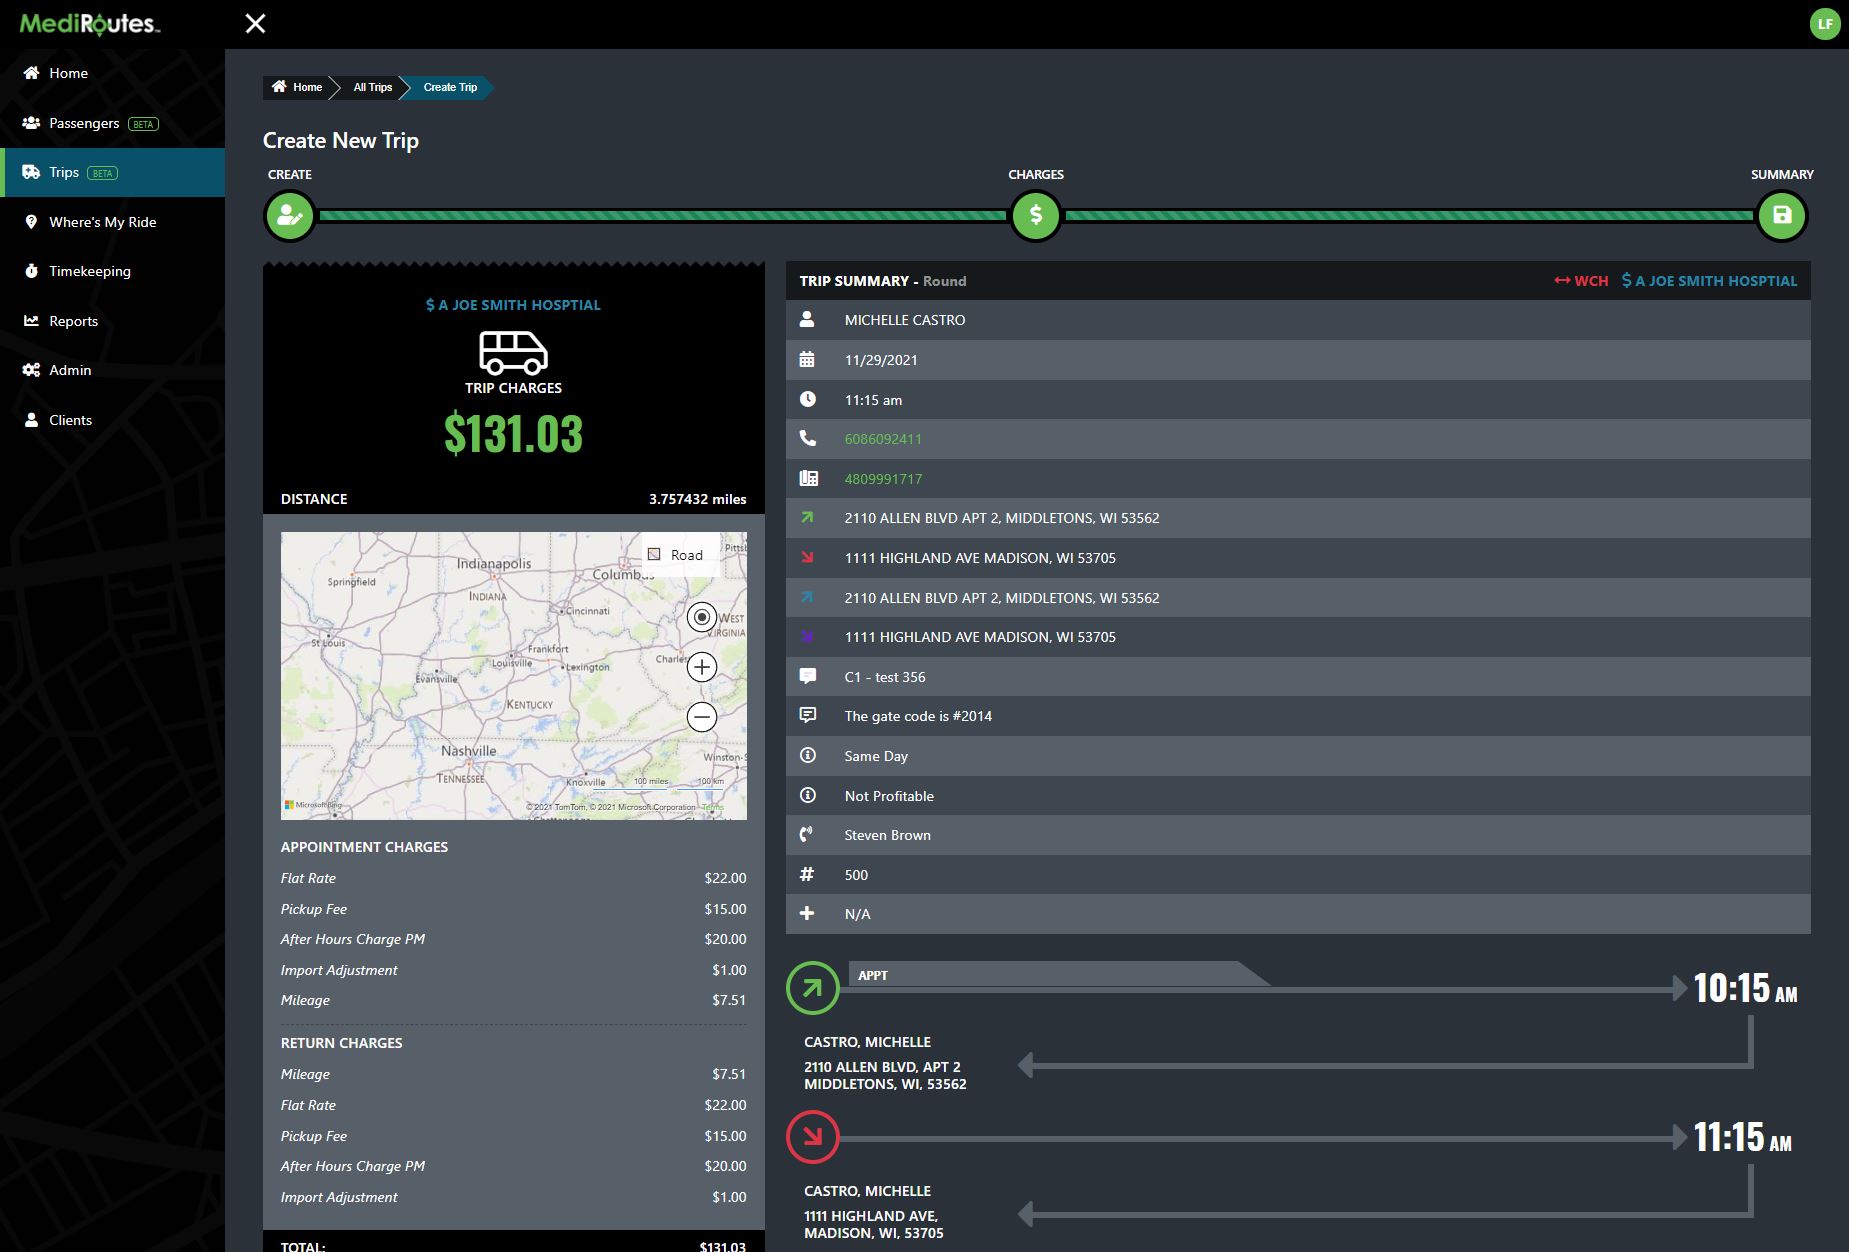
At left, we have the Rider Trip Receipt which shows the following:
- Routed Trip on Map
- Total Trip Cost
- Individual Trip Charges
- Funding Source
- Trip Distance
The main summary table at right has all the choices you selected for each option when building out the trip. If you see any "N/A" values, you can always click back to a previous step and fill-in that information. Your free to jump between steps at any time to make edits before clicking the Save button.
Icon Meaning
Users can always hover over the icons in the table to get a title for the icon. But for reference, we've listed all the icons and their meaning below.
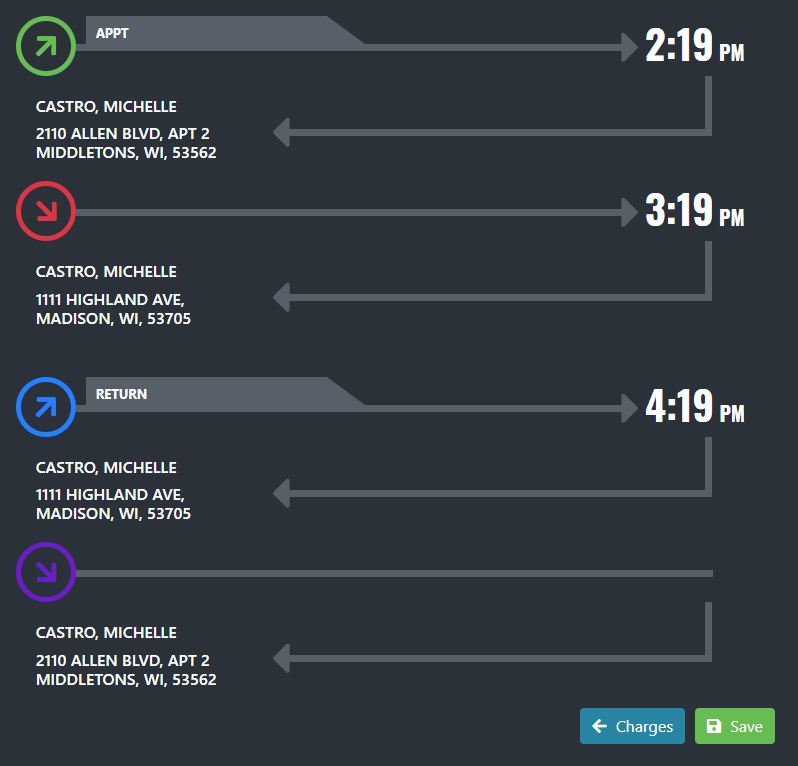
Below the main summary table is the Pickup and Dropoff Address's. This will change if the trip is a Round Trip, or a One-Way Trip. For the example below, we've chose a Round Trip.
Step 7 - Save Trip
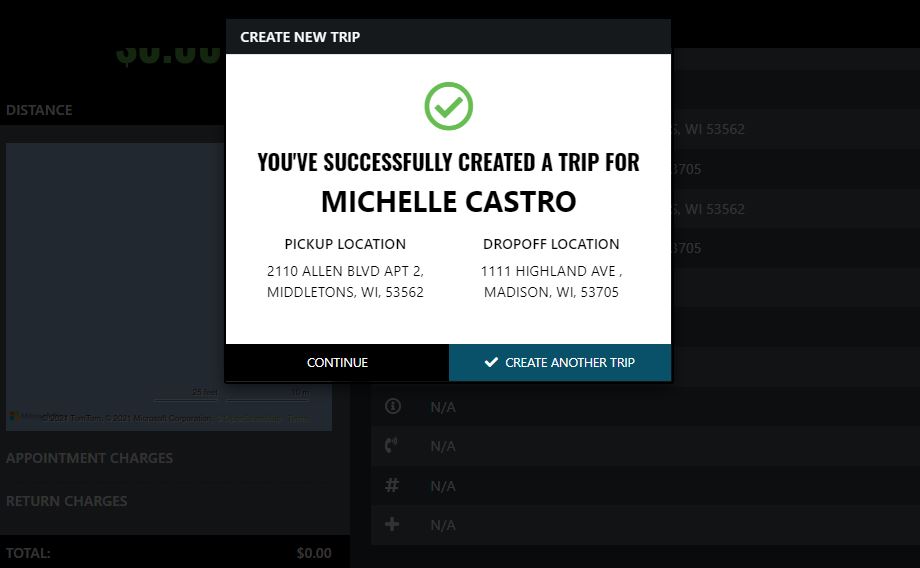
With all the trip details filled out we can now save the trip! To save, simply click the green Save button at the bottom of the summary page. After the trip has been successfully saved, the user will be shown a confirmation dialog with high-level trip details. The user can choose to Create Another Trip or they can click Continue to return to the All Trips List. For the sake of this tutorial, lets click Continue to go back and find our trip in the All Trips List.
Step 8 - The All Trips List Overview
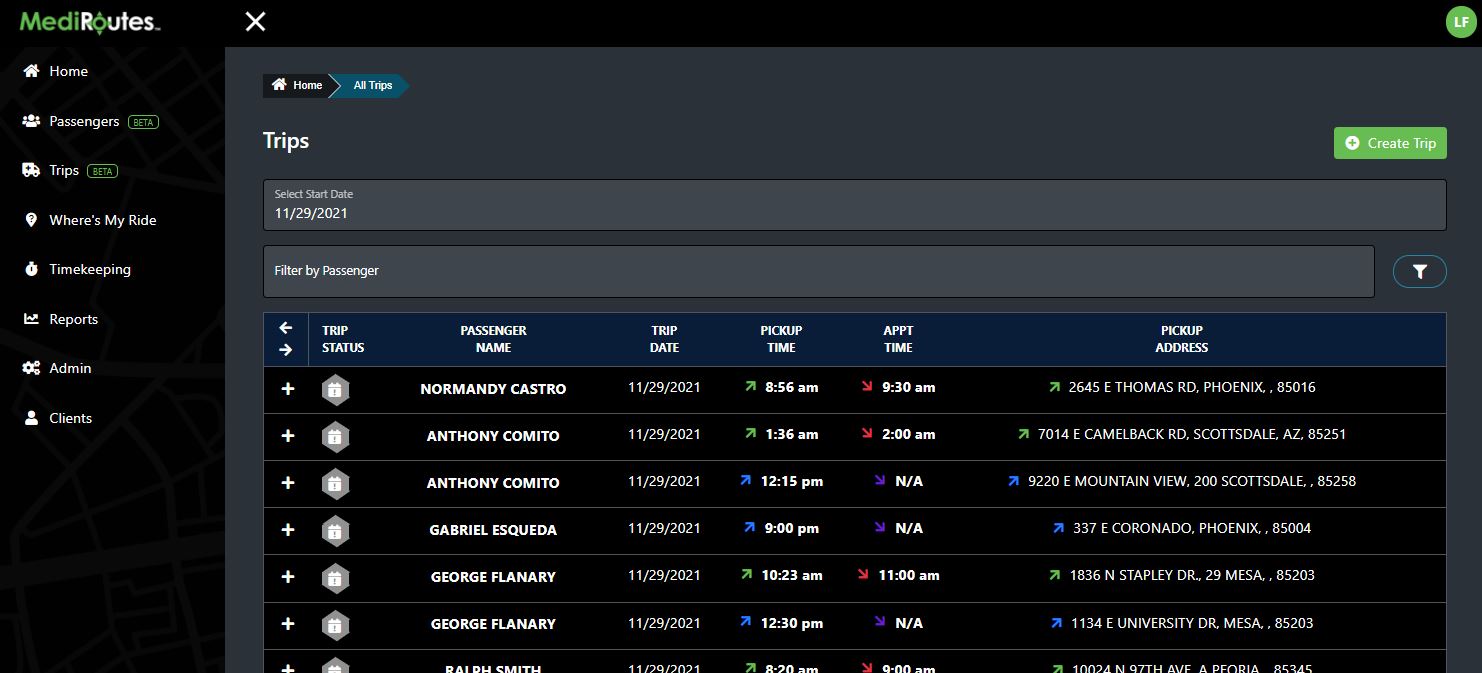
In our opinion, the All Trips List is one of the coolest new features built around Trip Intake. We attempted to rebuild the "beloved" trip list in the MediRoutes Desktop application which allows users to choose the fields they would like to display. The Desktop offered powerful sorting capabilities that our clients have grown to rely upon. We worked hard to keep all of those features in the web application and also let the user keep all of those features on a mobile device where we are dealing with a much smaller viewport.
Step 9 - Search for Trip
We can search for a trip by entering the passengers name as shown below. You also change the date to search for a future trip if you wish. The Trip Date will always default to today.

Step 10 - Navigating the Trip List
All information is presented to the user on the Trip List row. There is much more information than is shown in the screen shot below. On a mobile device users can swipe on a row to scroll and see all available information. On desktop or laptop computer, users can click the or buttons. This will scroll all the trips together along with the header so that users can easily sort columns vertically.
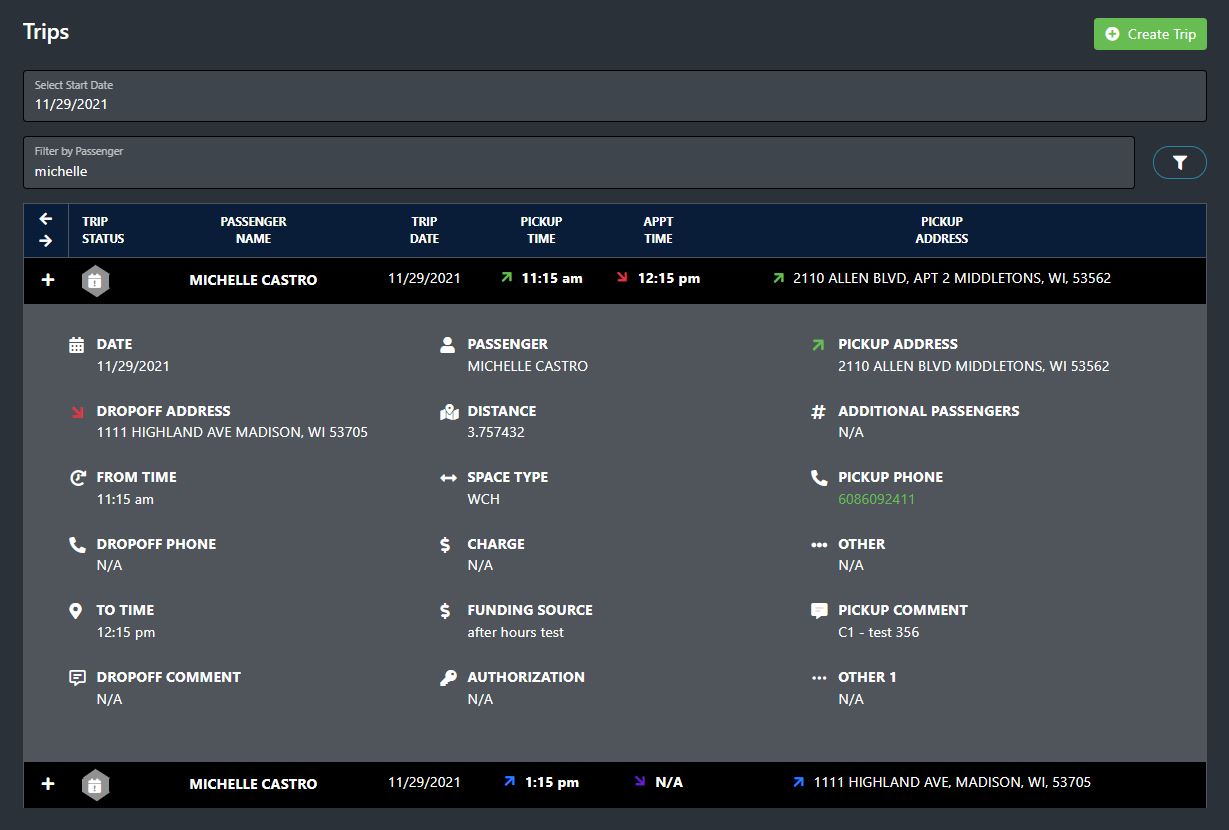
Trip details can be accessed by clicking on the header of the passenger trip list row. A drop down panel will reveal all the trip details for the trip. These are the same details that we created during the trip creation process.
Step 11 - Editing & Cancelling Trips
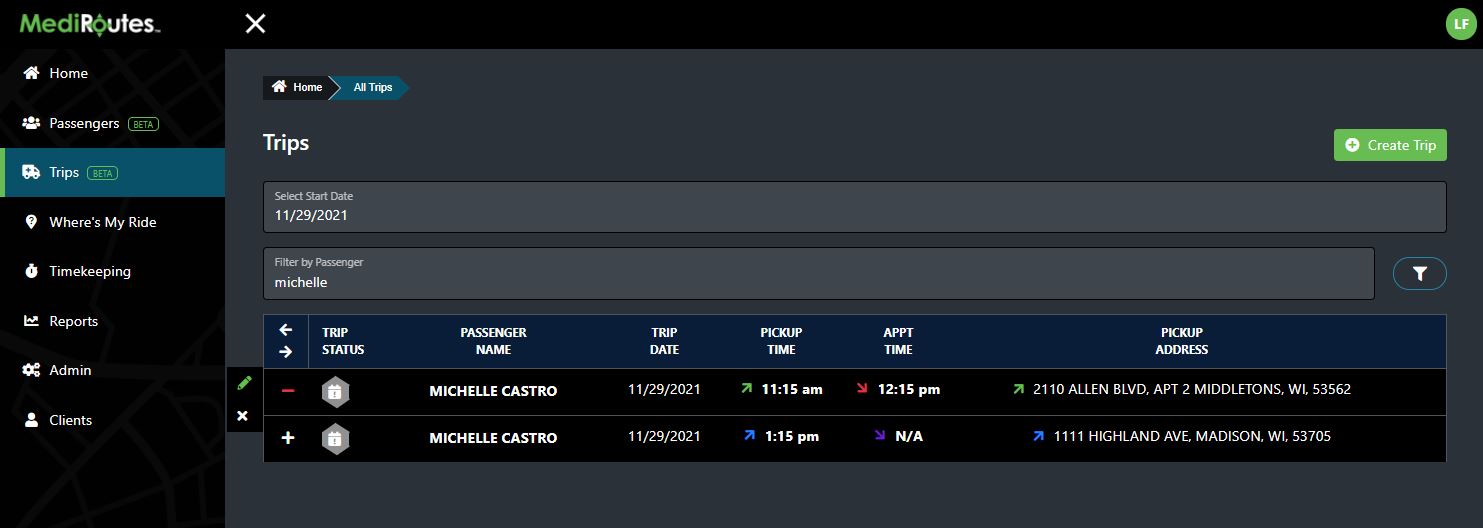
To edit or cancel a trip, click the icon to launch the Toolbox. To edit a trip, simply click the icon and you will be taken back to the Trip creation process where you can edit the required fields and re-save the trip. To Cancel a Trip, click the icon. A confirmation dialog will need to be approved before the trip will be cancelled. For reference, see below.
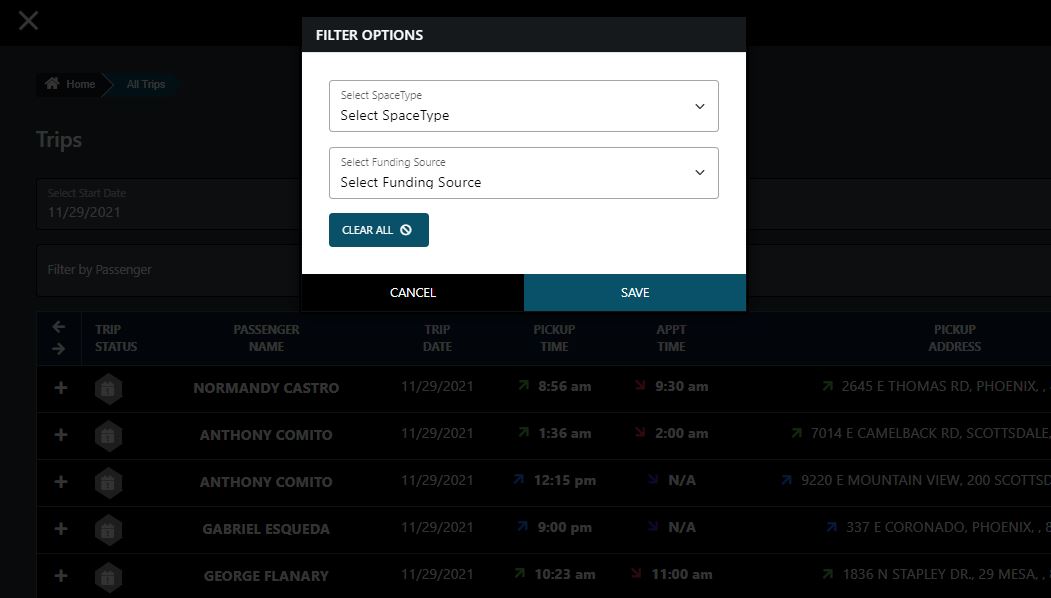
Step 12 - Filter Trips
You can filter trips by clicking the blue filter button next to the search bar. Users can currently filter by Space Type & Funding Source. To remove any active filters, simply re-open the filter dialog and click the Clear All button.

