Wheres My Ride - Passenger Portal
Transportation providers can easily share a link with their customers about upcoming trips. This allows passengers to see driver and trip information in semi real-time so they'll always know when their drivers arriving!
This has an additional benefit, in that you can display your logo and contact information - serving as a great marketing tool for the transportation provider.
The passenger portal link can be sent to patients by a dispatcher in Where's My Ride. This requires the dispatcher to search for a patient and select one of their trips. In the slide-out trip details, users can click the share button to launch a dialog where they can copy the URL to manually send to a patient.
To view the steps required for sending a passenger portal link, please read the documentation below.
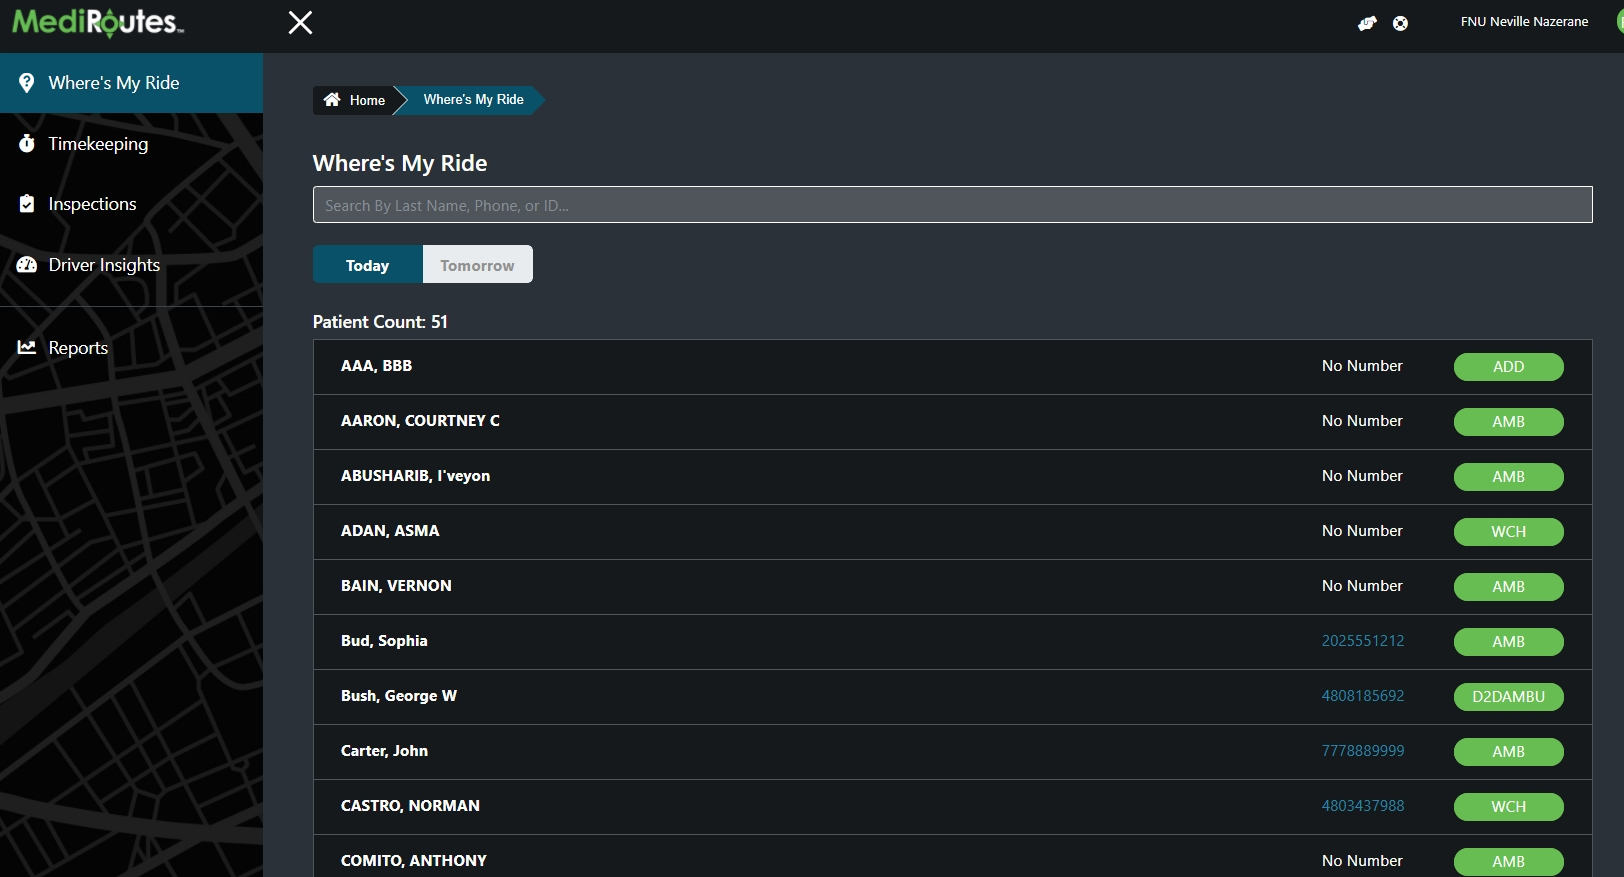
Step 1 – Select Patient In Where's My Ride
Select a patient to to display a list of their trips.
Step 2 – Select a Trip To View Its Details
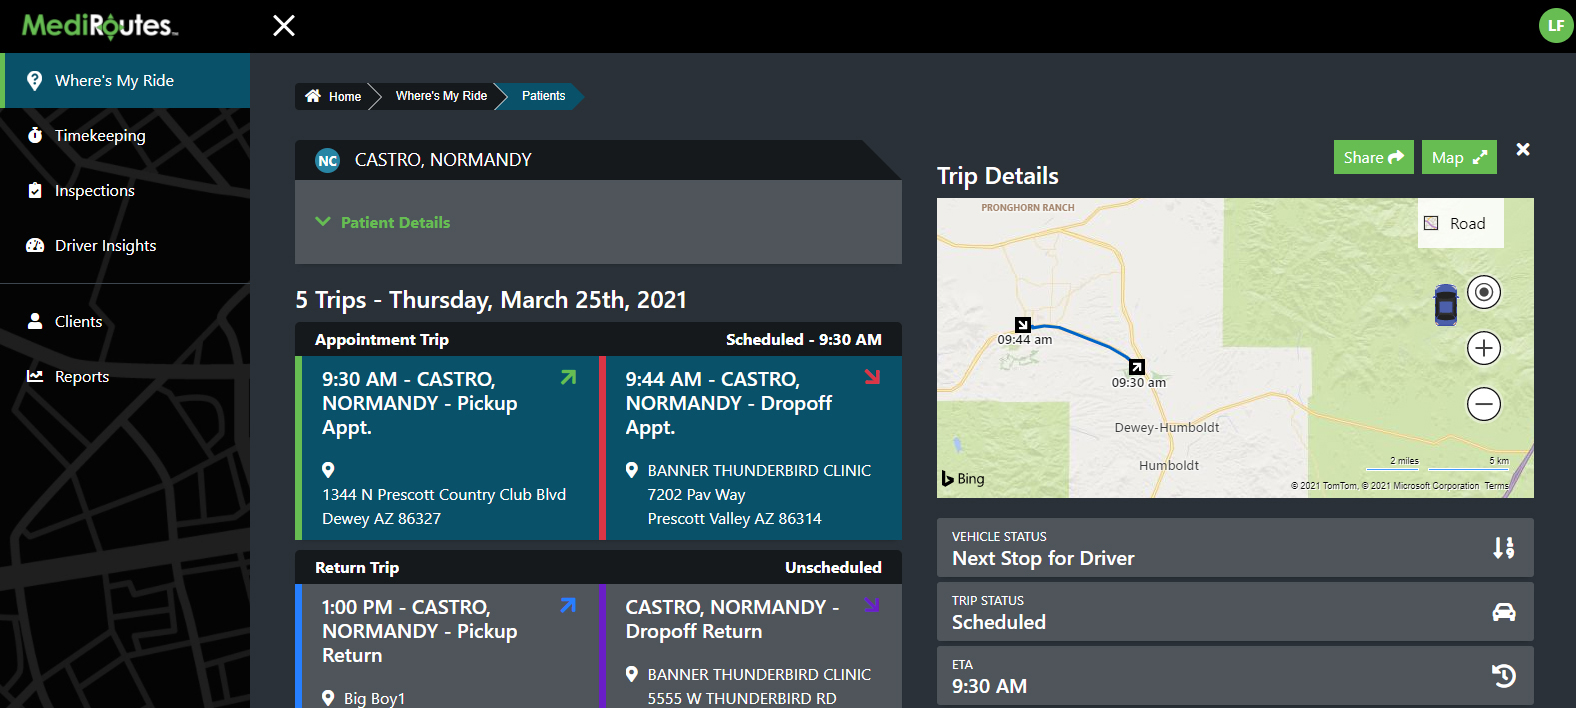
Selecting a trip will slide out details about the trip. Click the Share Button at top right.
Step 3 – Copy the Passenger Portal Link
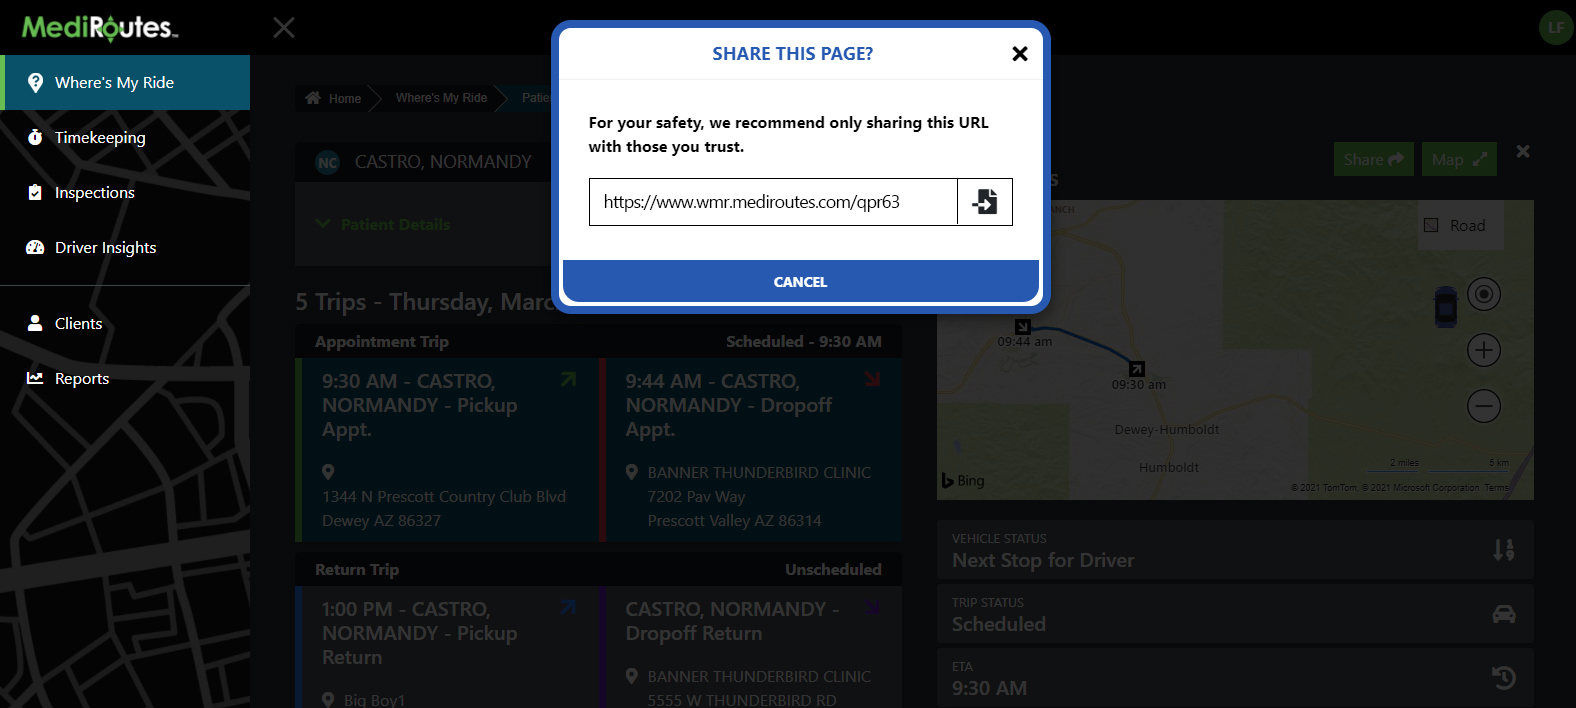
You can easily copy the WMR Passenger Portal Link by clicking the Copy To Clipboard button. This link can be shared with passengers, passenger family members, medical facilities, & health care professionals without violating HIPPA Rules & Regulations.
Step 4 – Patient Opens Link
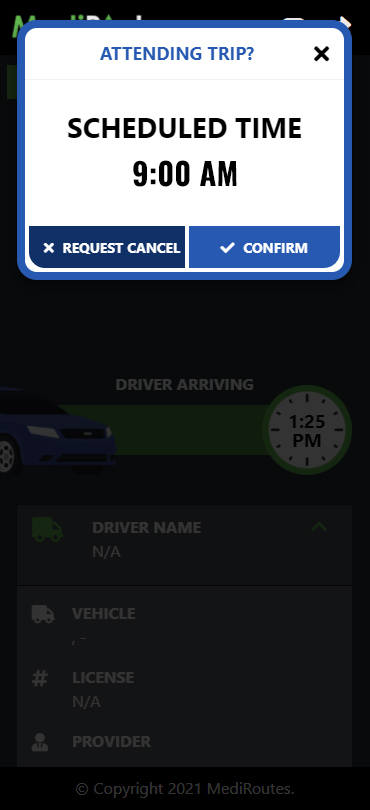
When the passenger opens the Passenger Portal link, they will be asked to Confirm or Request Cancel which helps prevent No-Show or Cancel-at-Door situations ahead of time. If a passenger Requests a Cancel, the dispatcher will need to approve the cancel in the MR Desktop application before the trip is officially cancelled. For the upcoming steps we'll assume the patient has Confirmed the trip
Step 5 – Where's My Ride Passenger Portal
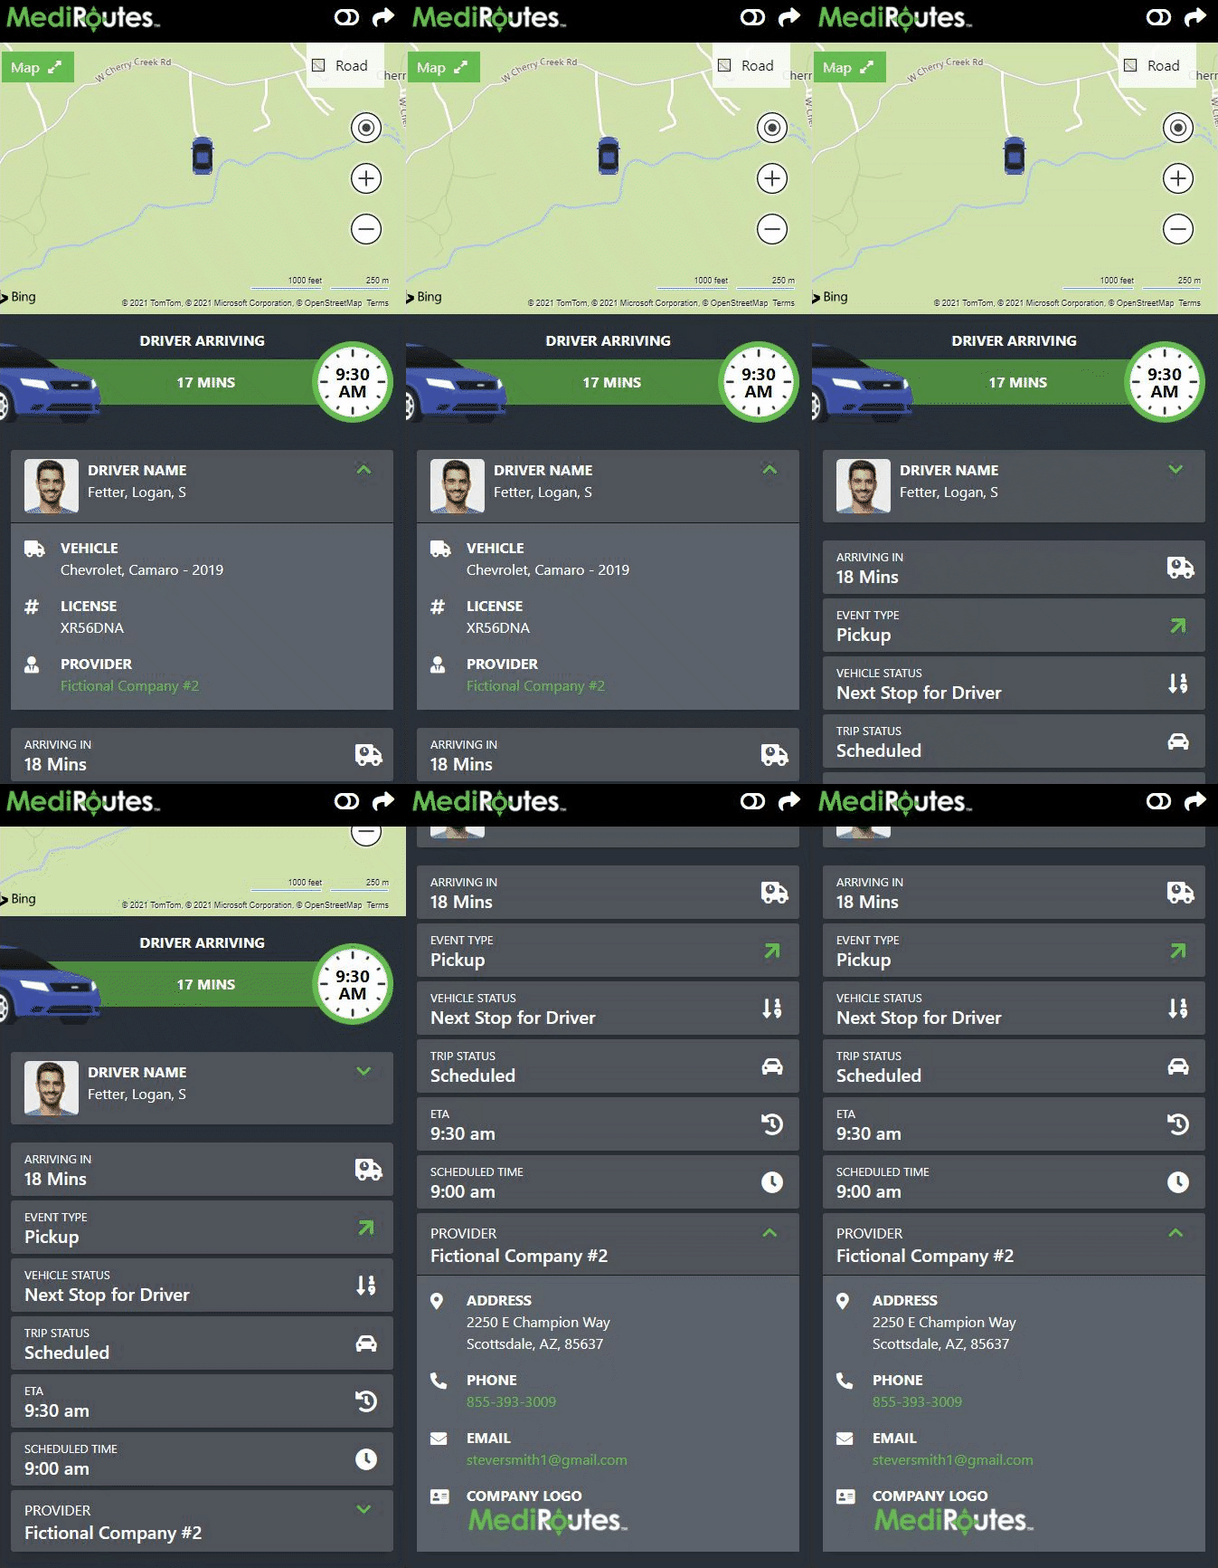
After confirming, the passenger lands on the Where's My Ride Passenger Portal and can see their trip and driver information. The driver details are automatically opened on page load but can be toggled closed to conserve space. The WMR Passenger Portal page tracks the following data.
- ETA & Scheduled Event Times
- Drivers Location in Semi Real-Time on Map
- Driver Information (Name, Vehicle Make, Vehicle Model, Vehicle Year & License Plate Number)
- Provider Information (Company Name, Address, Company Phone, Email, Logo)
- Event Type (Pickup or Dropoff)
- Vehicle Status
- Trip Status
- No HIPPA Data
Step 6 – Trip Details Are Updated in Semi Real-Time
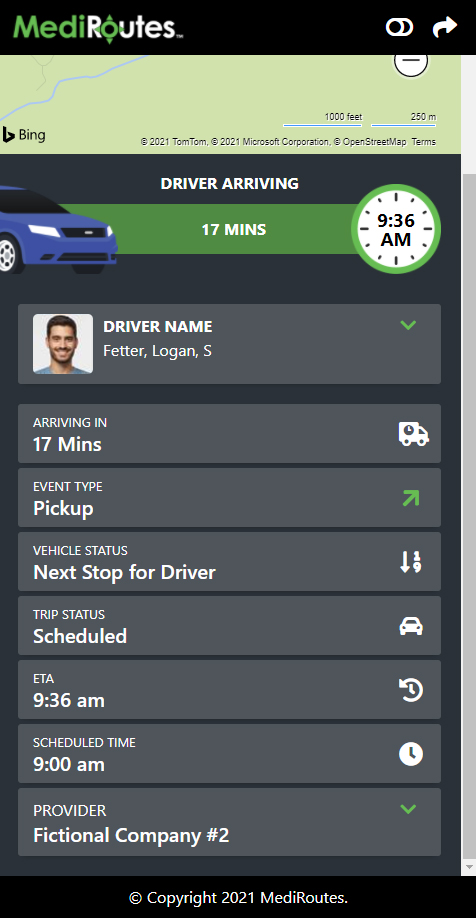
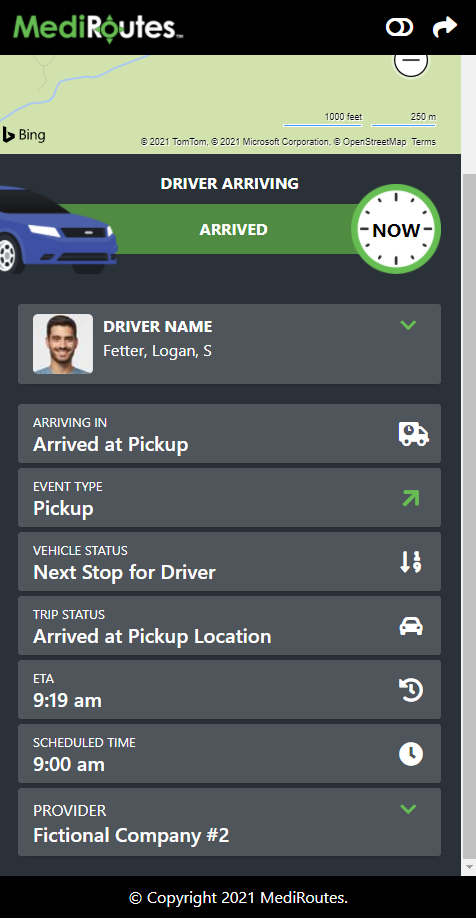
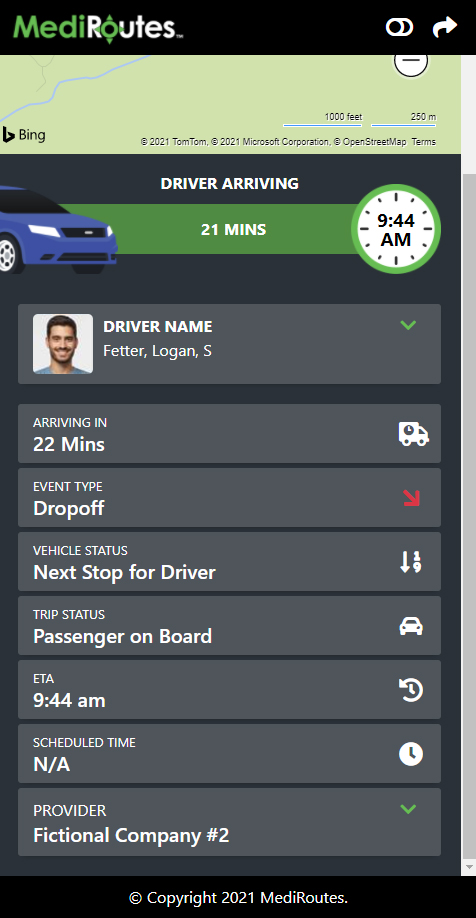
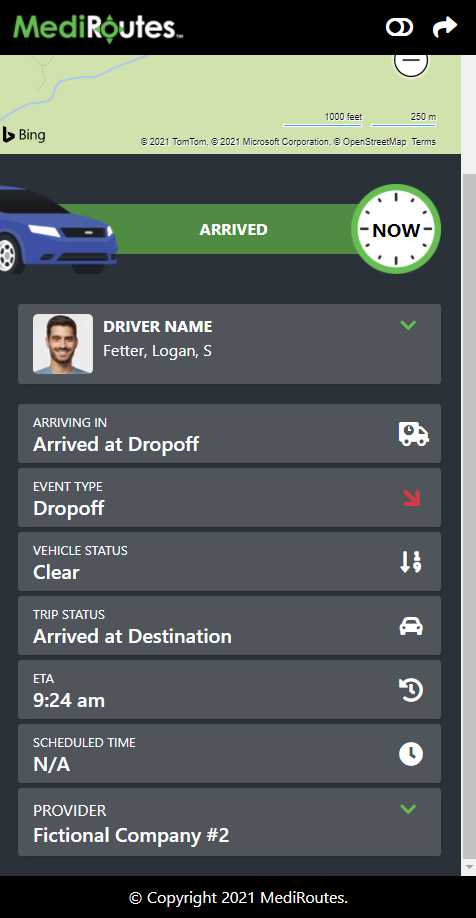
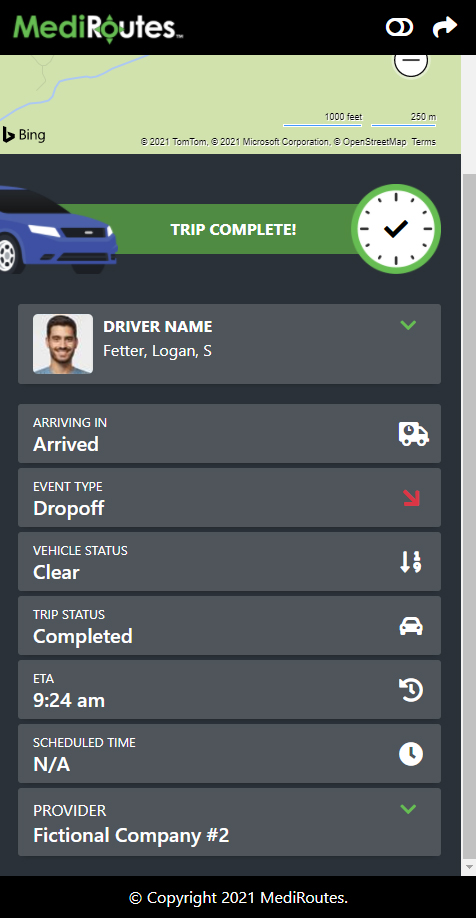
When the driver arrives and performs trips on the MediRoutes Mobile Application, the passengers portal page will update for the passenger. Below, we can see the various events from pickup to dropoff.
Step 7 – Passengers Can Switch Between Light & Dark Theme
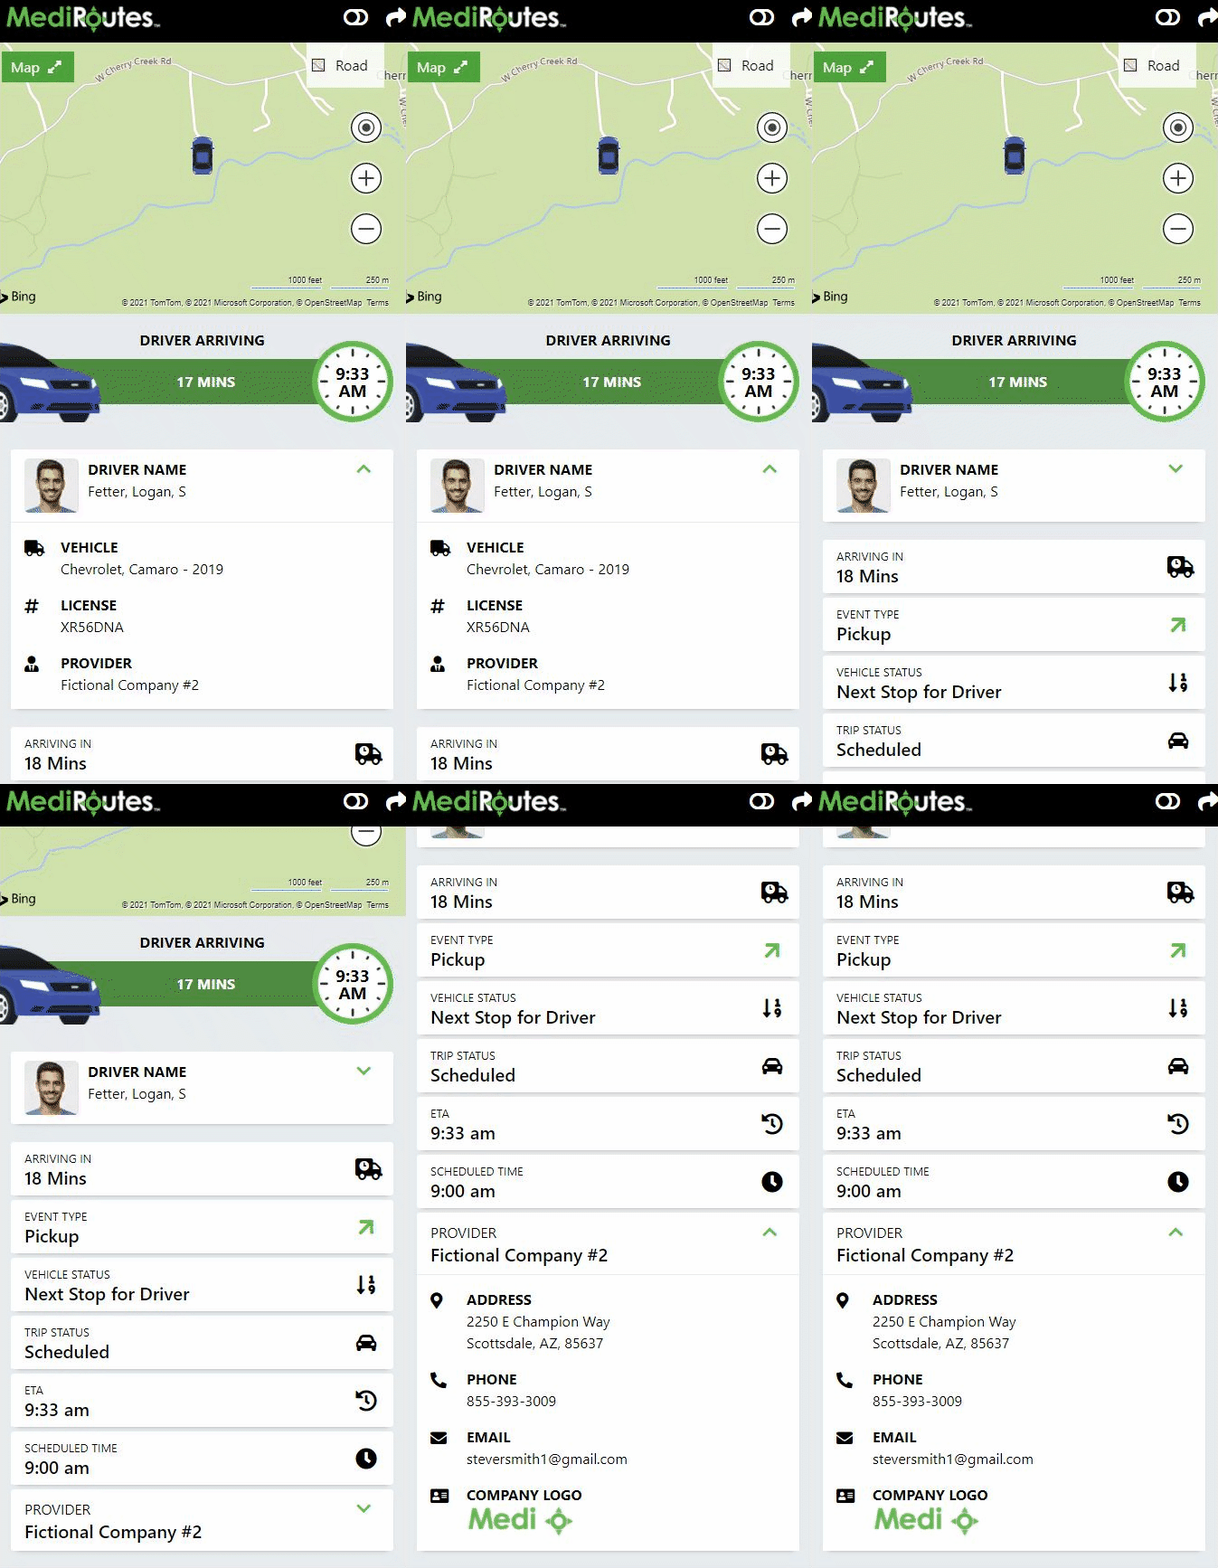
Passengers can easily switch between light & dark themes by clicking the toggle icon in the header bar of the WMR Passenger Portal page. This is to accomodate passengers who may be color blind and to address ease of viewing during night or day.
Step 8 – Passengers Can Expand Map to Full Screen
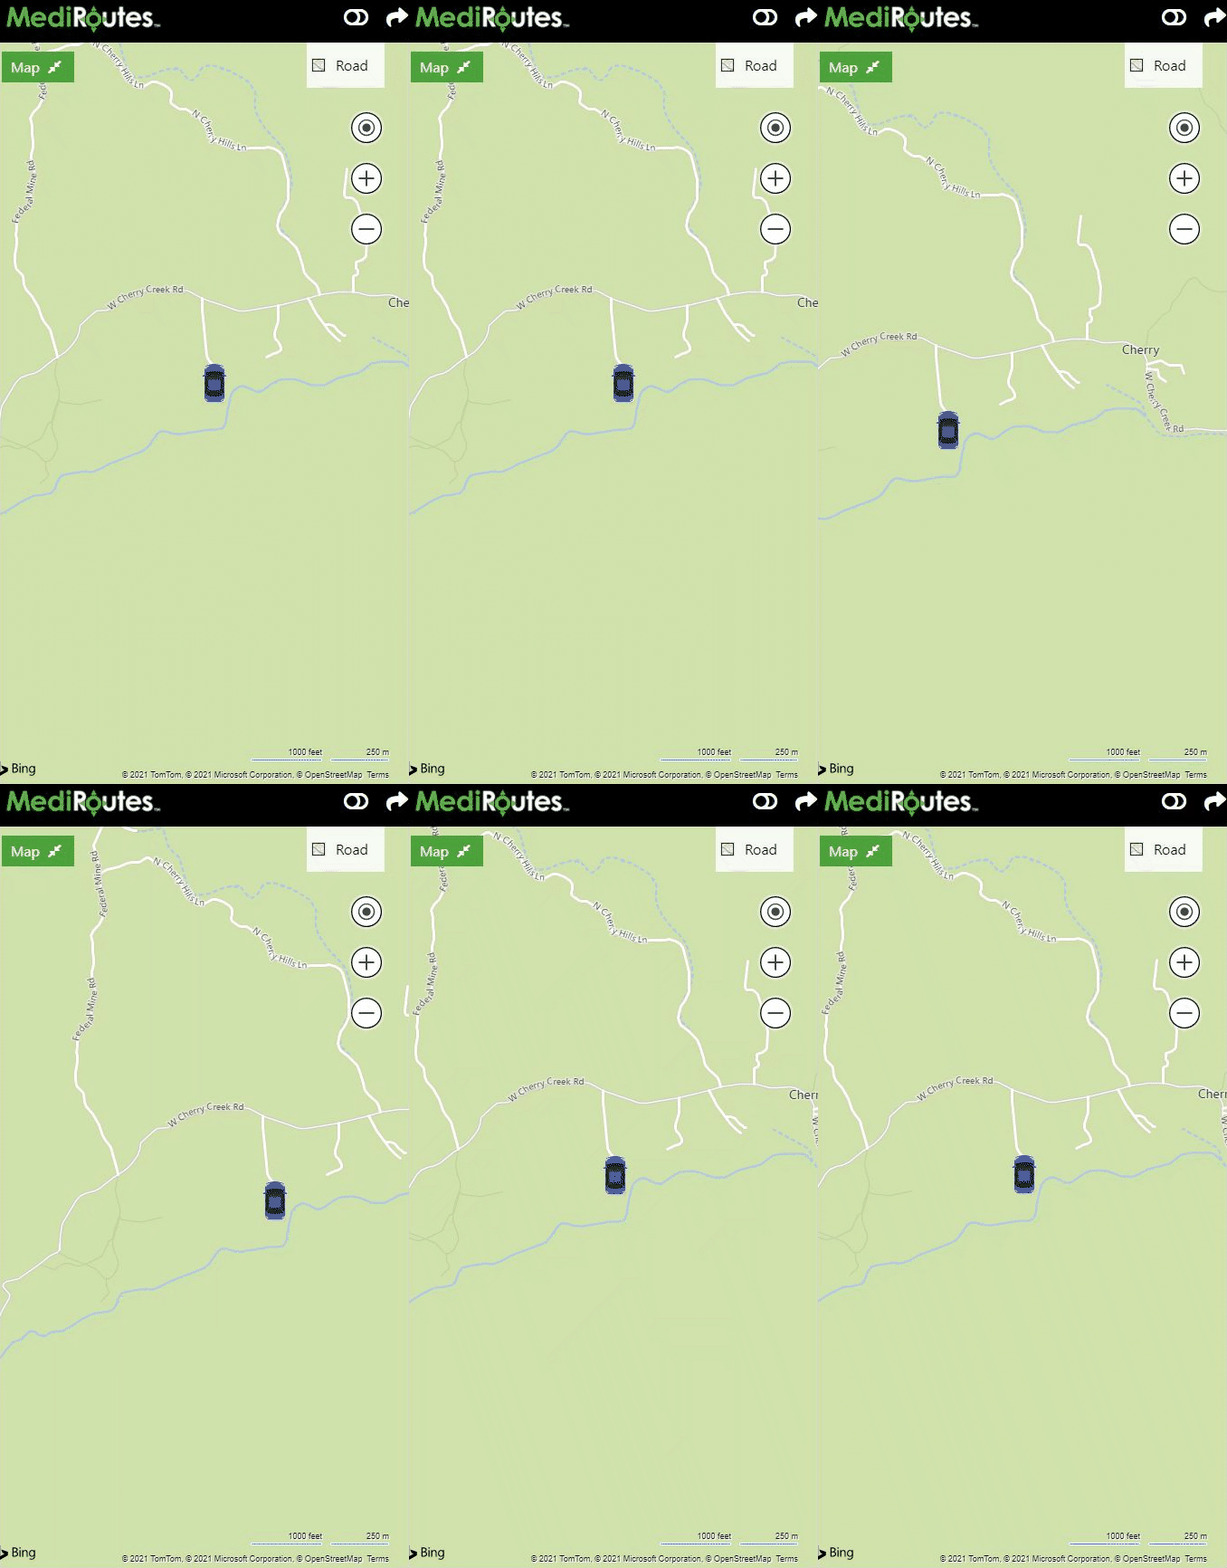
Passengers can see their drivers location even easier by clicking the Expand Map button. This helps passengers see the drivers surroundings a little easier.
Step 9 – Passengers Can Share The WMR Passenger Portal Page
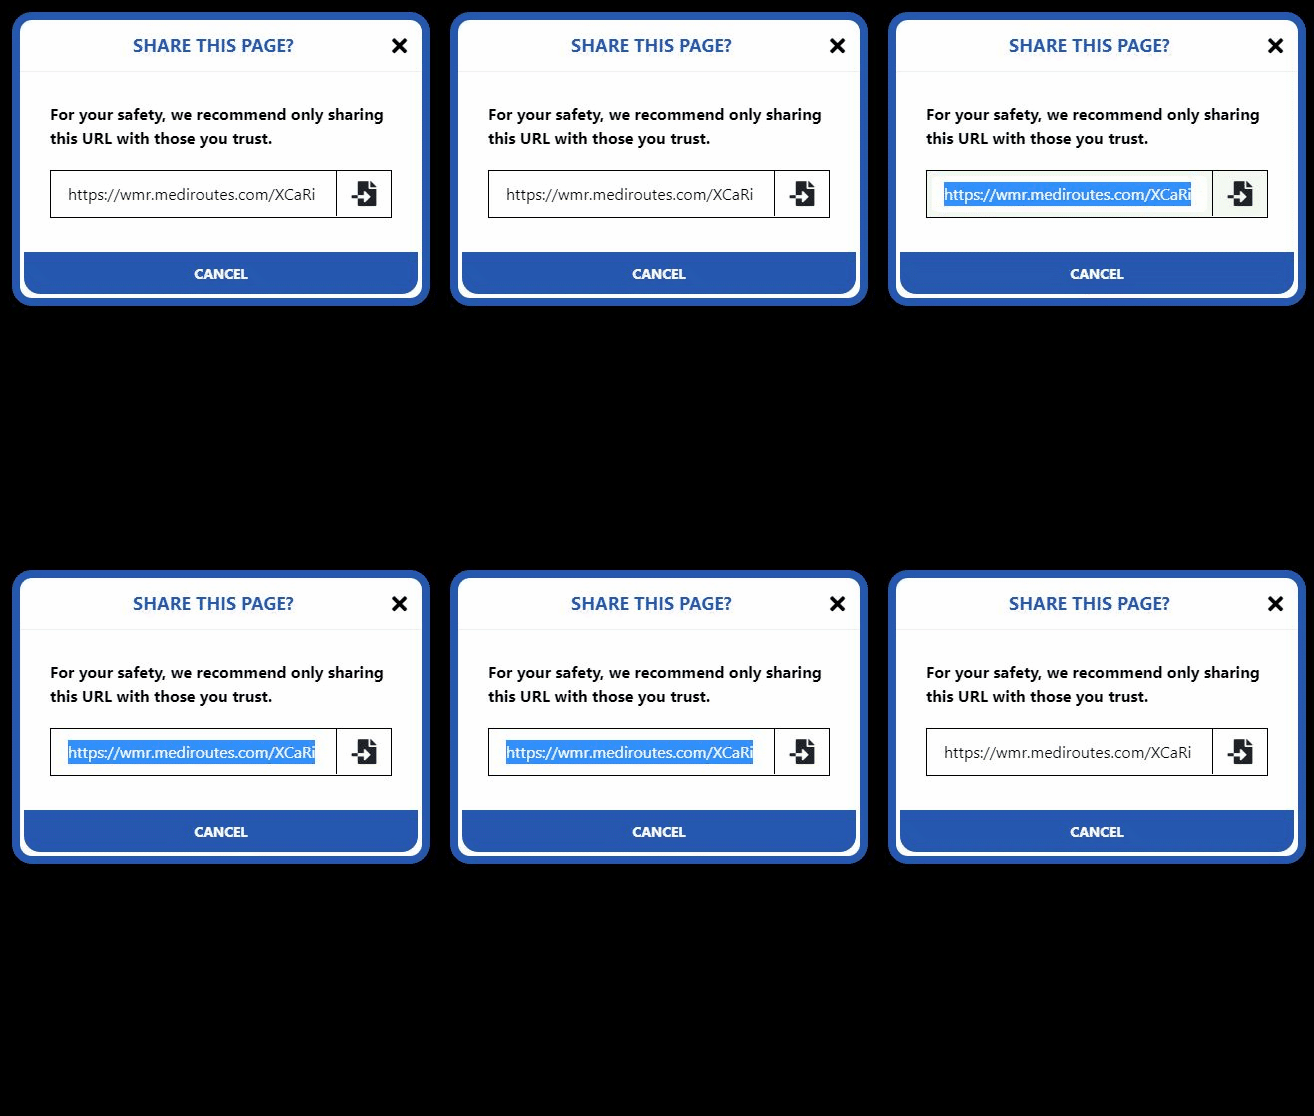
A passenger can easily share their trip information with a loved one or health care professional by clicking the Share Arrow in the header bar.The passenger can simply click the Copy-To-Clipboard icon and text or email the link. None of the information shared violates HIPPA Rules & Regulations.
Step 10 - Send WMR Passenger Portal Link Through Desktop
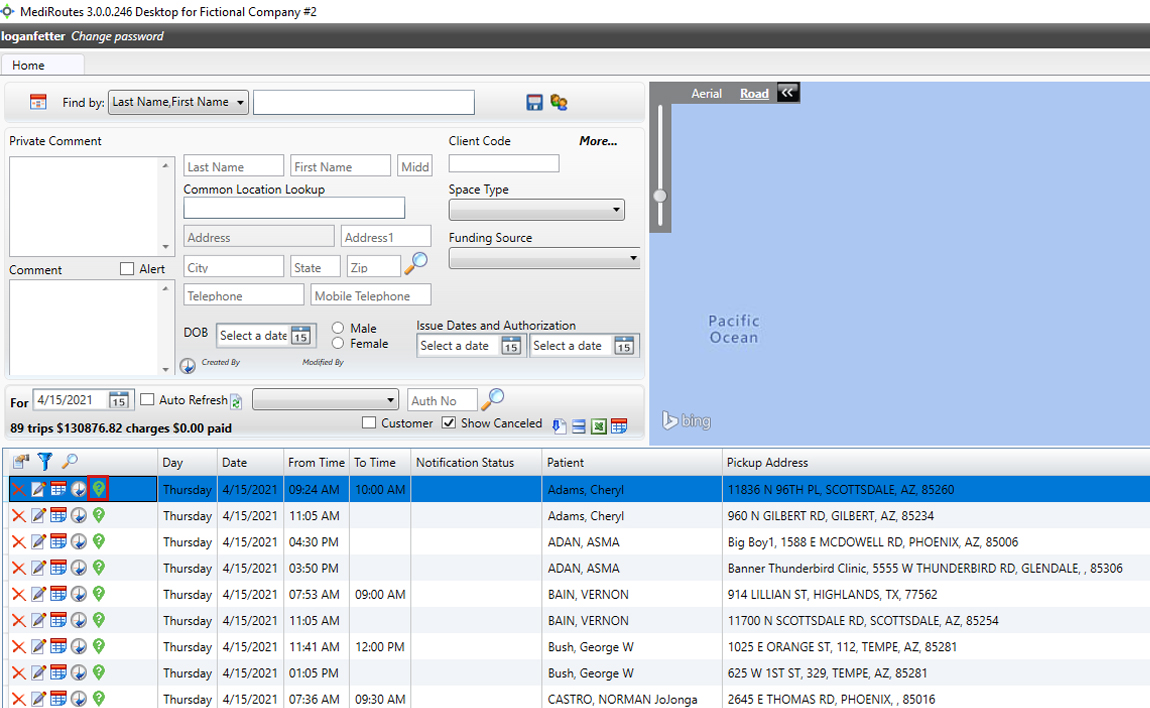
Users can also send the WMR Passenger Portal link through the desktop application. To launch the Passenger Portal Dialog box, click the green Where's My Ride icon in the desktop controls as shown below.
Step 11 - Copy the URL in the Passenger Portal Dialog
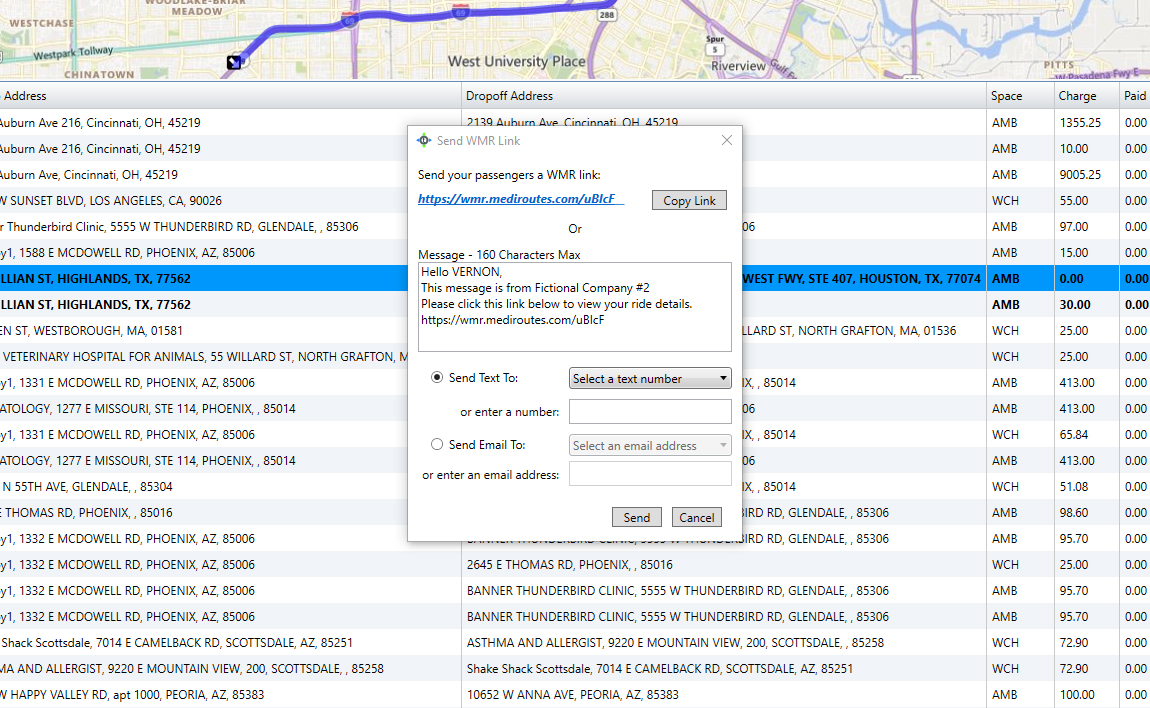
When the Passenger Portal Dialog box opens, users can click the Copy Link button to easily copy the URL and share it with a passenger. The user can also text or email a message directly to the passenger with the link already included. Users can send the Passenger Portal link or message to any email or phone number on the passengers master client record.
Additional WMR Passenger Portal Information
- The WMR Passenger Portal link will only be valid 24 hours after a trip was completed.
- In MediRoutes, trips are broken into two pieces, an Appointment and a Return. Each of these legs has two events - the pickup and the dropoff. This is important to understand becasue when the dropoff event has been performed by the driver the trip is complete. If the passenger needs a return trip from a facility back home for example - a second link will need to be sent to the passenger for the return trip.
- When refering to semi-real time, the speed in which updates occur can vary depending on internet connection and other factors. For most situations the updates will occur in seconds.
- We highly recommend that transportation providers add their company logo and contact information in the Mediroutes Desktop application.
- We highly recommend that driver profile pictures be added for all drivers.